
Vtiger CRM is a cloud-based customer relationship management (CRM) software that helps businesses manage their sales, marketing, and customer support activities. It offers a range of features such as lead management, contact management, sales forecasting, email marketing, and customer support ticketing.
Vtiger CRM is designed to be highly customizable, allowing businesses to tailor the software to their specific needs. It also integrates with a variety of third-party applications, including Google Apps, Office 365, and Zapier, making it easy to sync data between different systems.
In this tutorial, we will show you how to install Vtiger CRM on Ubuntu 22.04.
Step 1: Update Operating System
Update your Ubuntu 22.04 operating system to the latest version with the following command:
# apt update && sudo apt upgrade -yStep 2: Install Apache webserver
You can install it via apt package manager with the following command.
# apt install apache2Verify the status of the Apache service using systemctl status command:
# systemctl status apache2Output:
● apache2.service - The Apache HTTP Server
     Loaded: loaded (/lib/systemd/system/apache2.service; enabled; vendor preset: enabled)
     Active: active (running)
       Docs: https://httpd.apache.org/docs/2.4/
   Main PID: 14406 (apache2)
      Tasks: 55 (limit: 2193)
     Memory: 4.8M
        CPU: 29ms
     CGroup: /system.slice/apache2.service
             ├─14406 /usr/sbin/apache2 -k start
             ├─14408 /usr/sbin/apache2 -k start
             └─14409 /usr/sbin/apache2 -k start
Step 3: Install PHP and PHP extensions
By default, PHP 8.1 is included in the Ubuntu 22.04 default repository. You can install PHP 8.1 using the following command:
# apt-get install php libapache2-mod-php php-{cli,common,curl,zip,gd,mysql,xml,mbstring,json,intl,imap}Verify if PHP is installed.
# php -vOutput:
PHP 8.1.2-1ubuntu2.11 (cli) (built: Feb 22 2023 22:56:18) (NTS)
Copyright (c) The PHP Group
Zend Engine v4.1.2, Copyright (c) Zend Technologies
with Zend OPcache v8.1.2-1ubuntu2.11, Copyright (c), by Zend Technologies
Update php.ini file
Now it’s time to increase values in the php.ini file.
Open php.ini file:
# nano /etc/php/8.1/apache2/php.ini
Change the following data:
memory_limit = 256M
upload_max_filesize = 128M
display_errors = Off
log_errors = Off
short_open_tag = Off
max_execution_time = 60
date.timezone = America/Chichago
Then save this php.ini file.
After that, you should restart apache2 for the configuration to take effect:
# systemctl restart apache2Step 4: Install MariaDB and create a database
To install MariaDB run the following command:
# apt install mariadb-server mariadb-clientVerify the status of the MariaDB service using systemctl status command:
# systemctl status mariadbOutput:
● mariadb.service - MariaDB 10.6.12 database server
     Loaded: loaded (/lib/systemd/system/mariadb.service; enabled; vendor preset: enabled)
     Active: active (running)
       Docs: man:mariadbd(8)
             https://mariadb.com/kb/en/library/systemd/
    Process: 58518 ExecStartPre=/usr/bin/install -m 755 -o mysql -g root -d /var/run/mysqld (code=exited, status=0/SUCCESS)
    Process: 58519 ExecStartPre=/bin/sh -c systemctl unset-environment _WSREP_START_POSITION (code=exited, status=0/SUCCESS)
    Process: 58521 ExecStartPre=/bin/sh -c [ ! -e /usr/bin/galera_recovery ] && VAR= ||   VAR=`cd /usr/bin/..; /usr/bin/galera_recovery`; [ $? -eq 0 ]   && >
    Process: 58560 ExecStartPost=/bin/sh -c systemctl unset-environment _WSREP_START_POSITION (code=exited, status=0/SUCCESS)
    Process: 58562 ExecStartPost=/etc/mysql/debian-start (code=exited, status=0/SUCCESS)
   Main PID: 58550 (mariadbd)
     Status: "Taking your SQL requests now..."
      Tasks: 9 (limit: 3623)
     Memory: 60.8M
        CPU: 1.720s
     CGroup: /system.slice/mariadb.service
             └─58550 /usr/sbin/mariadbd
Now Setup sql_mode:
# nano /etc/mysql/mariadb.conf.d/50-server.cnfInsert below line under [mysqld] section.
sql_mode = ERROR_FOR_DIVISION_BY_ZERO,NO_AUTO_CREATE_USER,NO_ENGINE_SUBSTITUTIONThen restart the MariaDB server.
# systemctl restart mariadbBy default, MariaDB is not hardened. You can secure MariaDB using the mysql_secure_installation script.
# mysql_secure_installationConfigure it like this:
- Set root password? [Y/n] Y
- Remove anonymous users? [Y/n] Y
- Disallow root login remotely? [Y/n] Y
- Remove test database and access to it? [Y/n] Y
- Reload privilege tables now? [Y/n] Y
Now run the command below to log in to the MariaDB shell.
# mysql -u root -pOnce you are logged in to your database server you need to create a database for the Vtiger CRM installation:
MariaDB [(none)]> CREATE DATABASE vtigercrm;
MariaDB [(none)]> CREATE USER 'vtigercrm'@'localhost' IDENTIFIED BY 'Str0ngPassf1';
MariaDB [(none)]> GRANT ALL PRIVILEGES ON vtigercrm. * TO 'vtigercrm'@'localhost';
MariaDB [(none)]> FLUSH PRIVILEGES;
MariaDB [(none)]> exit;
Step 5: Install Vtiger CRM
The latest version of Vtiger CRM is available to download from their website. You can download it with the following command:
# cd /var/www/
# wget https://tenet.dl.sourceforge.net/project/vtigercrm/vtiger%20CRM%207.5.0/Core%20Product/vtigercrm7.5.0.tar.gz
Extract the file with the following command:
# tar -xzvf vtigercrm7.5.0.tar.gzChange the ownership of the directory with the command:
# chown -R www-data:www-data /var/www/vtigercrm/Step 6: Configure Apache for Vtiger CRM
Navigate to /etc/apache2/sites-available directory and run the following command to create a configuration file for your Vtiger CRM installation:
# nano /etc/apache2/sites-available/vtigercrm.confAdd the following content:
<VirtualHost *:80>

ServerName your-domain.com
ServerAlias www.your-domain.com

ServerAdmin webmaster@your-domain.com
DocumentRoot /var/www/vtigercrm

<Directory /var/www/vtigercrm/>
Options +FollowSymlinks
AllowOverride All
Require all granted
</Directory>

ErrorLog ${APACHE_LOG_DIR}/your-domain.com_error.log
CustomLog ${APACHE_LOG_DIR}/your-domain.com_access.log combined

</VirtualHost>
Save the file and Exit.
Enable the Vtiger CRM virtual host:
# a2ensite vtigercrm.confEnable Apache rewrite mode.
# a2enmod rewriteRestart the Apache web server.
# systemctl restart apache2Step 7: Access your Vtiger CRM Application
Open your web browser and type the URL http://your-domain.com. You should see the following page:
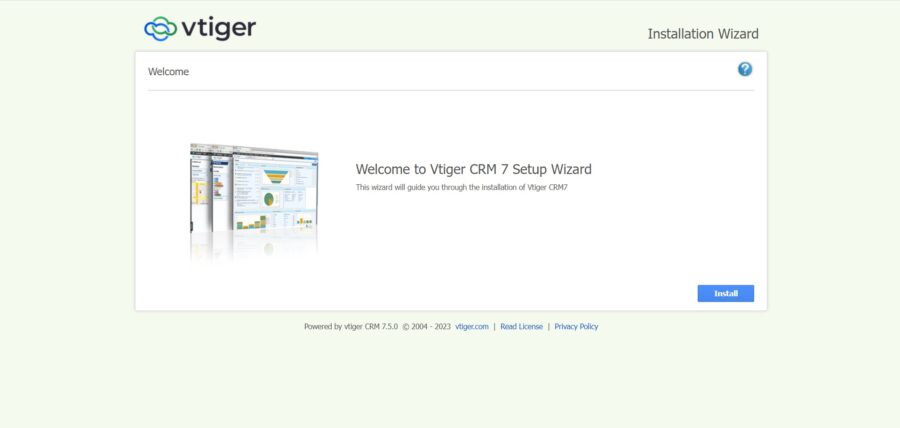
Click Install button to go through the setup wizard.
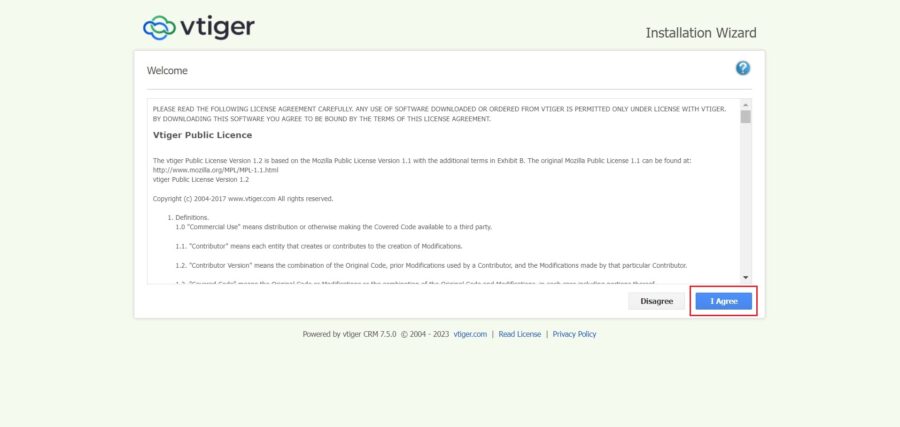
Accept the License Agreement by click “I Agree”. You should see the following page:
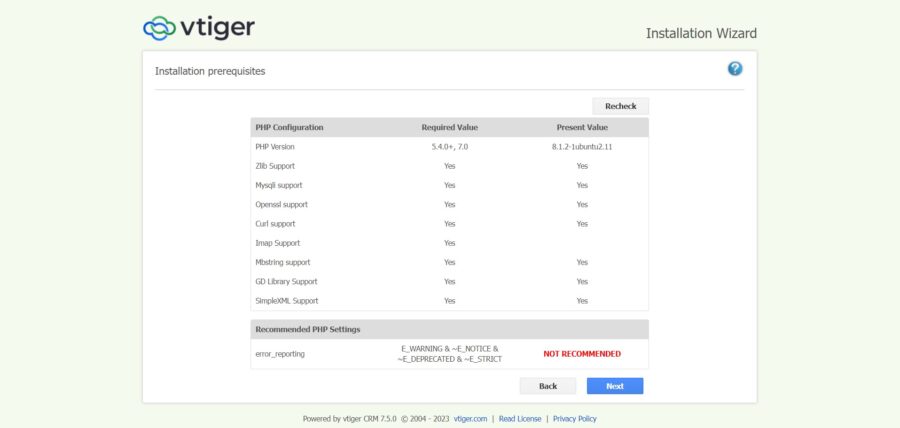
Verify installation prerequisites ensure that all pre-reqs are met. Otherwise fix them and then click on the Next button.
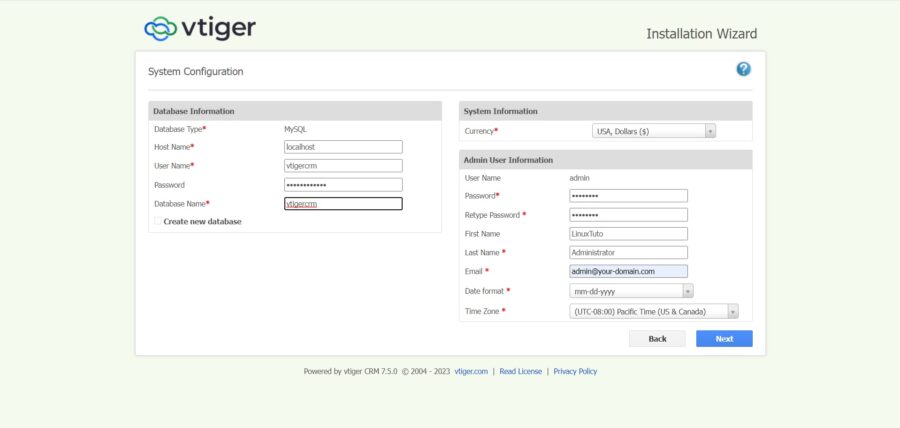
Provide your database name, database username, password, admin username and password.
Then, click on the Next button. You should see the following page:
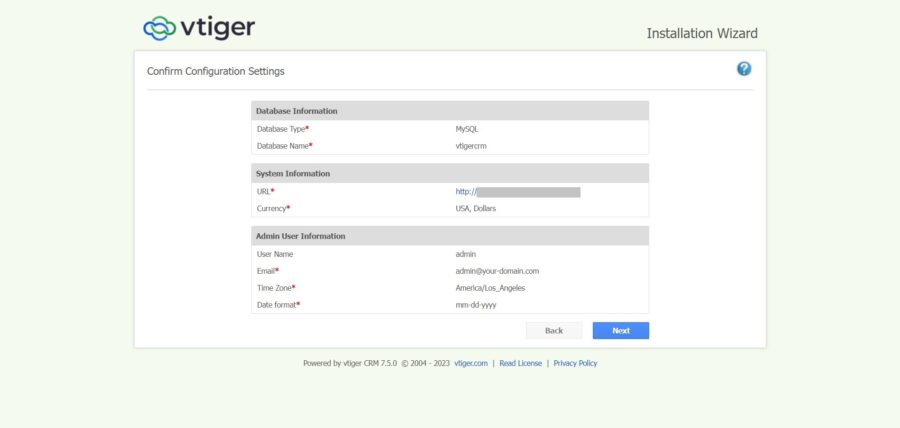
Review the system configuration settings and click Next button.
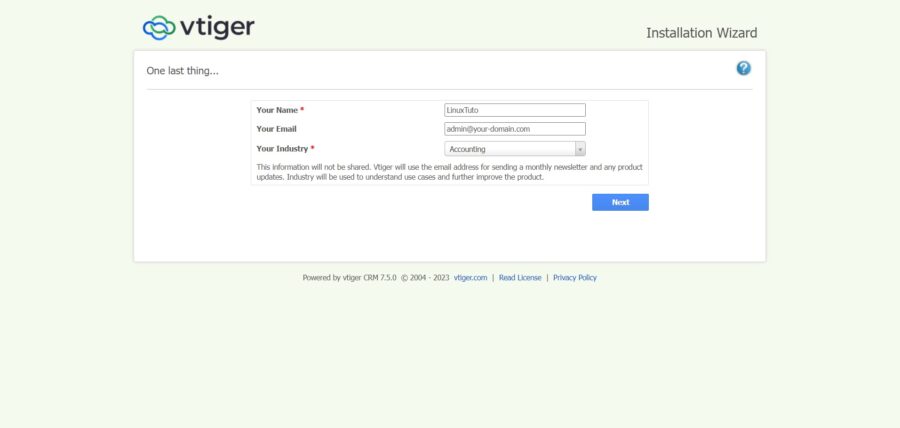
On the Next page, select your Industry and click Next to proceed with installation.
Once the installation is done, Select the modules for the Vtiger CRM features you would like to have.
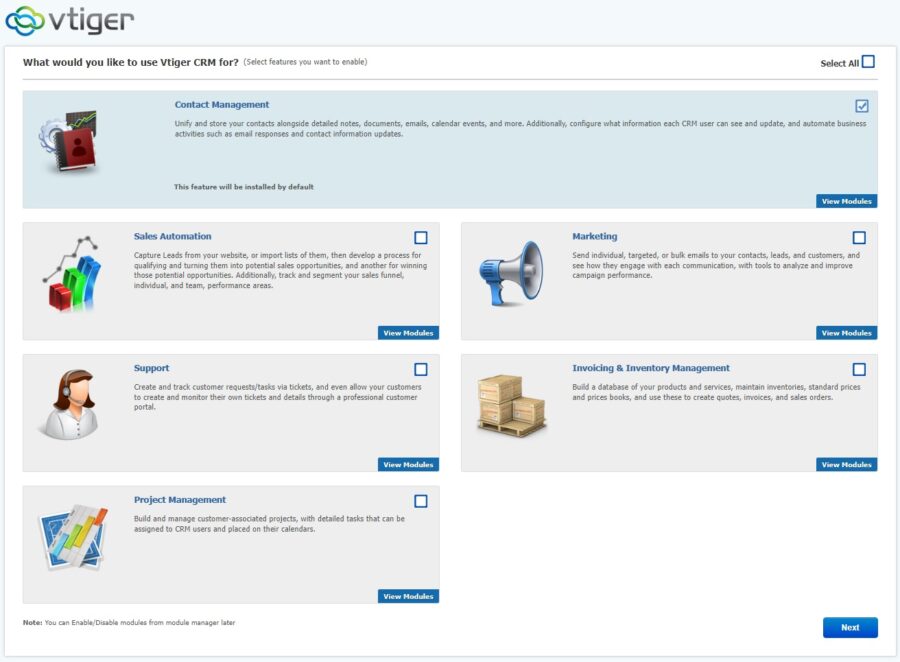
Click Next and you should see the Vitager CRM dashboard:
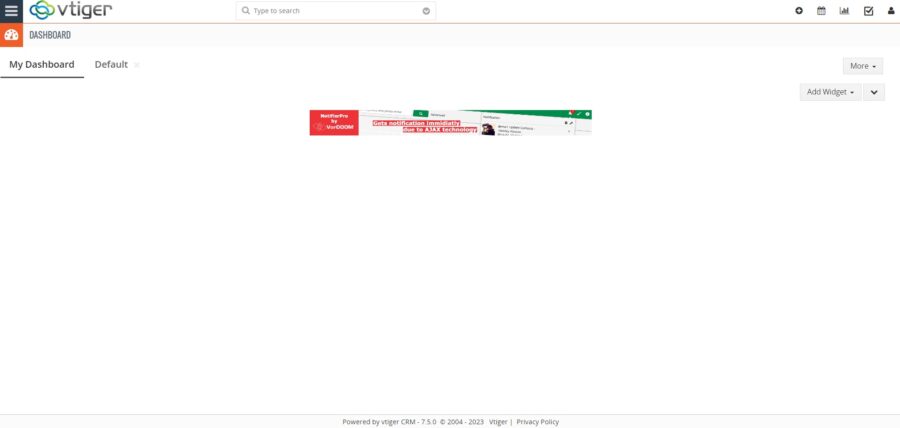
You can now add more widgets to your dashboard.
Comments and Conclusion
That’s it. You have successfully installed Vtiger CRM on Ubuntu 22.04.
For additional help or useful information, we recommend you to check the official Vtiger CRM documentation.
If you have any questions please leave a comment below.
This was a great step-by-step guide, thank you! I would add that the php-imap extension should also be installed if you want to use the mail manager option in vtiger.
Thank you for your suggestion. The tutorial has been updated.
Sorry 1 more suggestion if you don’t mind. In order to get the scheduler firing, I ran the following:
sudo nano /var/www/vtigercrm/config.inc.php
Add “$MINIMUM_CRON_FREQUENCY = 1;” #increases the firing frequency minimum from every 15 min to every 1 min
sudo crontab -e -u www-data
Add * * * * * sh /var/www/vtigercrm/cron/vtigercron.sh