
Portainer is an open-source container management tool that provides a web-based graphical user interface (GUI) for managing Docker containers, images, networks, and volumes.
Portainer supports multiple Docker environments, including Docker Swarm, Kubernetes, and Docker Desktop. It also provides features such as user authentication, role-based access control (RBAC), and multi-tenancy, making it a suitable tool for managing Docker resources in production environments.
In this tutorial, we will show you how to install Portainer on Ubuntu 22.04 OS.
Step 1: Update Operating System
Before we start, it is always a good practice to update your Ubuntu system to the latest packages. Open the terminal and run the following commands:
# apt-get update && sudo apt-get upgradeStep 2: Install Docker
Portainer is a Docker management tool, so you need to have Docker installed on your Ubuntu system. If you don’t have Docker installed, you can install it by running the following commands:
# apt-get install docker.ioYou can start the Docker service and configure it to run on startup by entering the following commands:
# systemctl start docker
# systemctl enable docker
Verify the status of the docker service using systemctl status command:
# systemctl status dockerOutput:
● docker.service - Docker Application Container Engine
     Loaded: loaded (/lib/systemd/system/docker.service; enabled; vendor preset: enabled)
     Active: active (running)
TriggeredBy: ● docker.socket
       Docs: https://docs.docker.com
   Main PID: 2449 (dockerd)
      Tasks: 7
     Memory: 22.7M
        CPU: 315ms
     CGroup: /system.slice/docker.service
             └─2449 /usr/bin/dockerd -H fd:// --containerd=/run/containerd/containerd.sock
Step 3: Install Portainer
Once you have Docker installed on your system, you can proceed to install Portainer.
Run the following command to pull the Portainer image from Docker Hub:
# docker pull portainer/portainer-ce:latestThen, start the Portainer container by running the following command:
# docker run -d -p 9000:9000 --restart always -v /var/run/docker.sock:/var/run/docker.sock portainer/portainer-ce:latestThe above command will start a Portainer container in the background and bind it to the port 9000.
Step 4: Access Portainer Web Interface
You can now access the Portainer web interface by opening a web browser and visiting http://your-IP-address:9000.
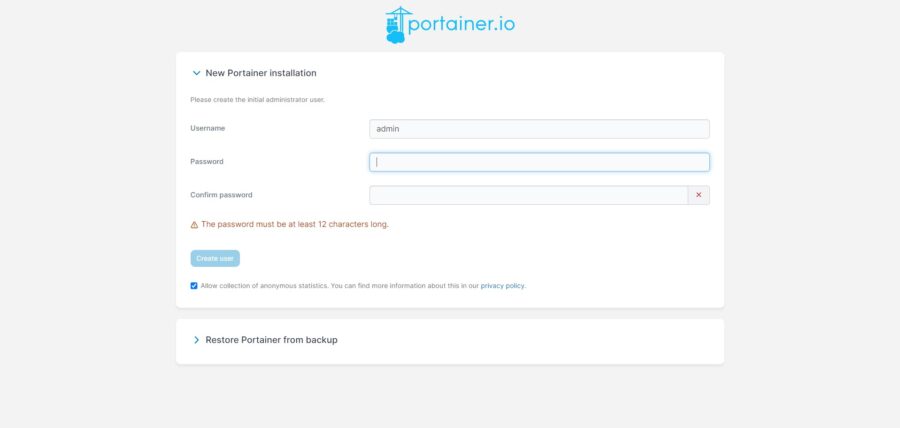
You should get Portainer login page to create an admin password. Set your admin user and password and click on the Create user button.
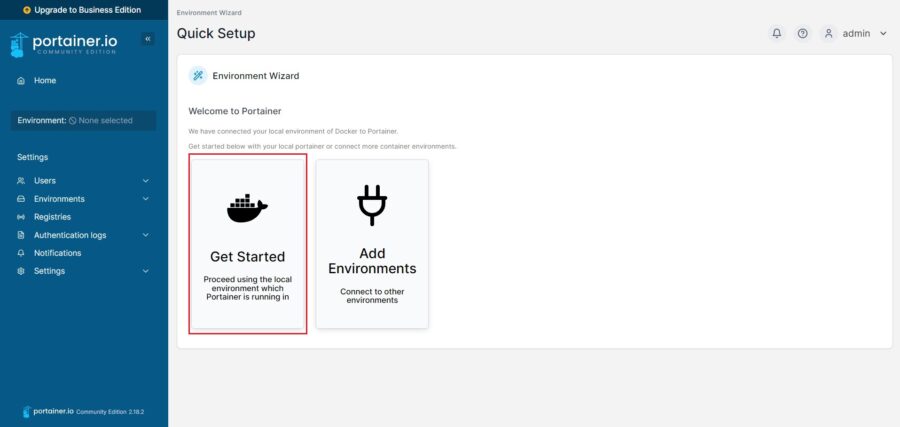
You will be asked to select the Docker environment that you want to manage. Select “Proceed using the local environment which Portainer is running in”
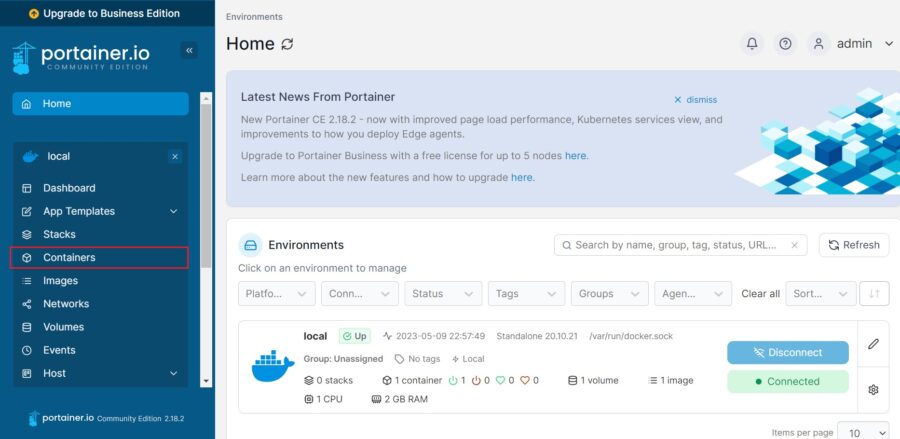
You should see the following page:

Step 5: Deploy Container Using Portainer
Now you can test your Portainer setup by deploying a test Docker container. Follow the steps below to install an Nginx web server.
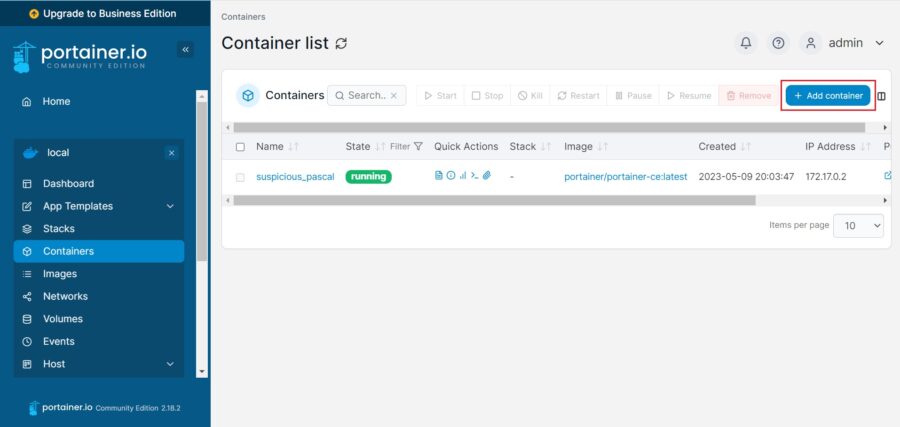
Select Containers in the menu on the left side:
Click the Add container button in the action bar.
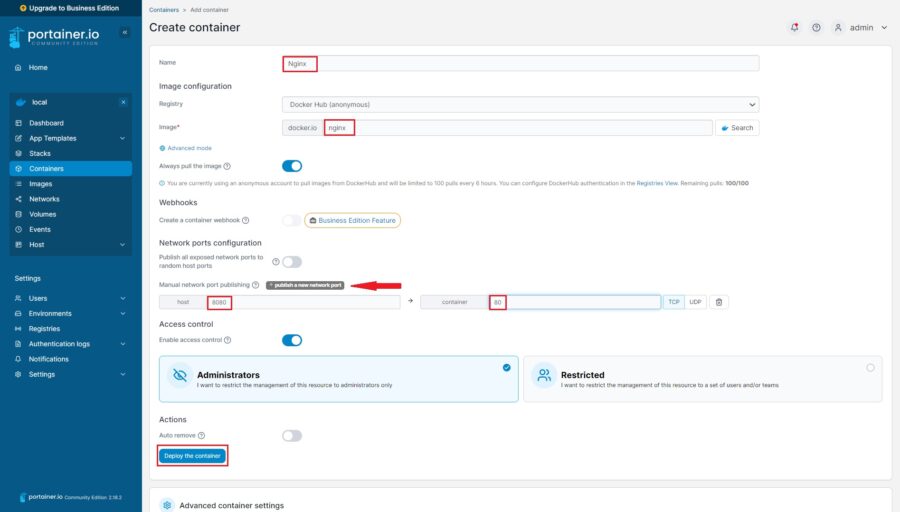
Type information for the container you want to run, including the container name, the image name, and the connection ports. Then select the Deploy the container button.
After completing the above steps, to verify the creation of the defined container, one can check on the dashboard.
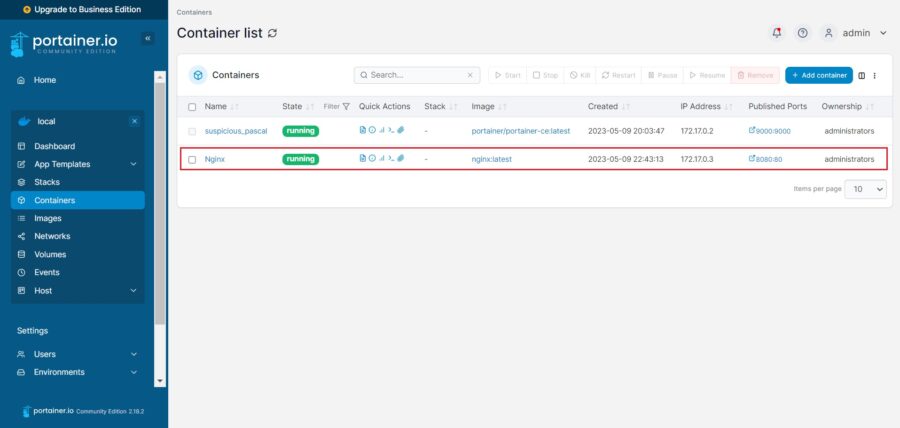
Open your browser and type http://your-IP-address:8080 . You will see the Nginx webserver welcome page.

Comments and Conclusion
Congratulations! You have successfully installed Portainer to manage Docker containers on Ubuntu 22.04.
For additional help or useful information, we recommend you to check the official Portainer documentation.
Thanks for this tuto. Everything is Ok.
But Portainer says “New version available 2.19.5”. How can I update ?
Regards