
Magento is a open source e-commerce platform written in PHP and uses the Zend Framework. It is highly popular ecommerce platform and it is owned and managed by Adobe Inc. The platform is flexible and has a large variety of features to build an online store.
In this tutorial we will show you how to install the Open Source version of Magento 2.4.4 on Debian 11.
Before starting the installation, you can check the system requirement for installing Magento2 here:

System prerequisites
Your system will need to satisfy the requirements below before proceeding.
- Apache Web server
- MySQL 8.0
- PHP 8.1
- Composer – an application-level package manager for the PHP
Step 1: Update Operating System
Update your Debian 11 operating system to make sure all existing packages are up to date:
$ sudo apt update && sudo apt upgrade -yStep 2: Install Apache web server
To install Apache web server, run the following command:
$ sudo apt install apache2Once installed, Apache should be running. If it’s not, for whatever reason, start it:
$ sudo systemctl start apache2Then enable it to start on boot time.
$ sudo systemctl enable apache2Step 3: Install PHP and PHP extensions for Magento 2.4.4
Magento 2.4.4 require PHP 8.1, so we will install PHP 8.1 in this tutorial.
By default, PHP 8.1 is not included in the Debian 11 default repository. So you will need to add the DEB.SURY.ORG repository to APT.
First, install the required packages using the following command:
$ sudo apt-get install ca-certificates apt-transport-https software-properties-common -yOnce all the packages are installed, add a Sury repository to APT using the following command:
$ sudo echo "deb https://packages.sury.org/php/ $(lsb_release -sc) main" | tee /etc/apt/sources.list.d/sury-php.listNext, download and add the GPG key with the following command:
$ sudo wget -qO - https://packages.sury.org/php/apt.gpg | apt-key add -Once you are done, update the repository with the following command:
$ sudo apt-get update -yNow, you can install the PHP 8.1 using the following command:
$ sudo apt-get install php8.1 libapache2-mod-php php8.1-dev php8.1-bcmath php8.1-intl php8.1-soap php8.1-zip php8.1-curl php8.1-mbstring php8.1-mysql php8.1-gd php8.1-xmlVerify if PHP is installed.
php -vOutput:
PHP 8.1.4 (cli) (built: Mar 20 2022 16:52:39) (NTS)
Copyright (c) The PHP Group
Zend Engine v4.1.4, Copyright (c) Zend Technologies
with Zend OPcache v8.1.4, Copyright (c), by Zend Technologies
Update php.ini file
Now it’s time to increase values in the php.ini file. Open php.ini file:
$ sudo nano /etc/php/8.1/apache2/php.ini
Change the following data:
file_uploads = On
allow_url_fopen = On
short_open_tag = On
memory_limit = 512M
upload_max_filesize = 128M
max_execution_time = 3600
Then save this php.ini file.
After that, you should restart apache2 for the configuration to take effect:
$ sudo systemctl restart apache2.service
Step 4: Install MySQL 8 and create a database
To add the MySQL APT repository to your system run the following command:
$ sudo wget https://dev.mysql.com/get/mysql-apt-config_0.8.22-1_all.debInstall the release package.
$ sudo apt install ./mysql-apt-config_0.8.22-1_all.debYou can install MySQL with the following command:
$ sudo apt install mysql-serverStart the database server daemon, and also enable it to start automatically at the next boot with the following commands:
$ systemctl start mysql
$ systemctl enable mysql
Once the database server is installed, log into the MySQL prompt:
$ sudo mysql -u root -pTo create a database, database user, and grant all privileges to the database user run the following commands:
mysql> CREATE DATABASE magento_db;
mysql> CREATE USER 'magento_user'@'localhost' IDENTIFIED BY 'Password';
mysql> GRANT ALL ON magento_db.* TO 'magento_user'@'localhost';
mysql> FLUSH PRIVILEGES;
mysql> EXIT
Step 5: Installing Elasticsearch
Starting Magento 2.4, all installations must be configured to use Elasticsearch as the catalog search engine.
Elasticserach uses a secure HTTPS transaction for its repositories. Before we proceed with the installation we need to install the required dependencies:
$ sudo apt install apt-transport-https ca-certificates gnupg2Import the Elasticsearch GPG key.
$ sudo wget -qO - https://artifacts.elastic.co/GPG-KEY-elasticsearch | sudo apt-key add -Add the Elasticsearch repository.
$ sudo sh -c 'echo "deb https://artifacts.elastic.co/packages/7.x/apt stable main" > /etc/apt/sources.list.d/elastic-7.x.list'Update the apt package manager and install Elasticsearch:
$ sudo apt update && apt install elasticsearchThen start and enable the service.
$ sudo systemctl start elasticsearch.service$ sudo systemctl enable elasticsearch.serviceTo verify that Elasticsearch is running correctly, you will use the curl command:
$ curl -X GET "localhost:9200/"If Elasticsearch is working properly, the result should be like this:
{
"name" : "debian",
"cluster_name" : "elasticsearch",
"cluster_uuid" : "_95g0f6tQpOQZMR7ySyQQw",
"version" : {
"number" : "7.17.2",
"build_flavor" : "default",
"build_type" : "deb",
"build_hash" : "de7261de50d90919ae53b0eff9413fd7e5307301",
"build_date" : "2022-03-28T15:12:21.446567561Z",
"build_snapshot" : false,
"lucene_version" : "8.11.1",
"minimum_wire_compatibility_version" : "6.8.0",
"minimum_index_compatibility_version" : "6.0.0-beta1"
},
"tagline" : "You Know, for Search"
}
Step 6: Install Composer
To download Composer, run the following command:
$ sudo curl -sS https://getcomposer.org/installer | phpNext, move the composer file to the /usr/local/bin path.
$ sudo mv composer.phar /usr/local/bin/composerAssign execute permission:
$ sudo chmod +x /usr/local/bin/composerVerify the Composer version installed:
$ sudo composer --version

Output:
Composer version 2.2.6 2022-02-04 17:00:38
Step 7: Install Magento 2.4.4
For most situation it is recommended to install Magento using the Marketplace by creating access key.
Run the following command to download Magento 2.4.4 data:
$ composer create-project --repository-url=https://repo.magento.com/ magento/project-community-edition=2.4.4 /var/www/magento2Navigate to the Magento directory:
$ cd /var/www/magento2Chmod cache and static content folder
$ find var generated vendor pub/static pub/media app/etc -type f -exec chmod g+w {} +Change the ownership of the Magento directory to the webserver user and also the permissions:
$ sudo chown -R www-data:www-data /var/www/magento2
$ sudo chmod -R 755 /var/www/magento2
Now, install Magento using the composer command, type:
$ sudo bin/magento setup:install \
--base-url=http://your-domain.com \
--db-host=localhost \
--db-name=magento_db \
--db-user=magento_user \
--db-password=Password \
--admin-firstname=Admin \
--admin-lastname=User \
--admin-email=admin@your-domain.com \
--admin-user=admin \
--admin-password=admin123 \
--language=en_US \
--currency=USD \
--timezone=America/Chicago \
--use-rewrites=1
After the installation process you will see the admin link for your Magento site.
[SUCCESS]: Magento installation complete.
[SUCCESS]: Magento Admin URI: /admin_1od1xl
Nothing to import.
Step 8: Configure Apache Web Server for Magento 2.4.4
Navigate to /etc/apache2/sites-available directory and run the following command to create a configuration file for your Magento installation:
$ sudo nano /etc/apache2/sites-available/magento.confAdd the following content:
<VirtualHost *:80>

ServerAdmin webmaster@your-domain.com

ServerName your-domain.com
ServerAlias www.your-domain.com
DocumentRoot /var/www/magento2/pub

<Directory /var/www/magento2/>
        AllowOverride All
</Directory>

ErrorLog ${APACHE_LOG_DIR}/your-domain.com_error.log
CustomLog ${APACHE_LOG_DIR}/your-domain.com_access.log combined

</VirtualHost>
Save the file and Exit.
Enable the Magento virtual host and make sure you enable rewrite mod to use site friendly URLs:
$ sudo a2ensite magento.conf
$ sudo a2enmod rewrite
Restart the Apache web server.
$ sudo systemctl restart apache2Step 9: Access your Magento 2.4.4 Application
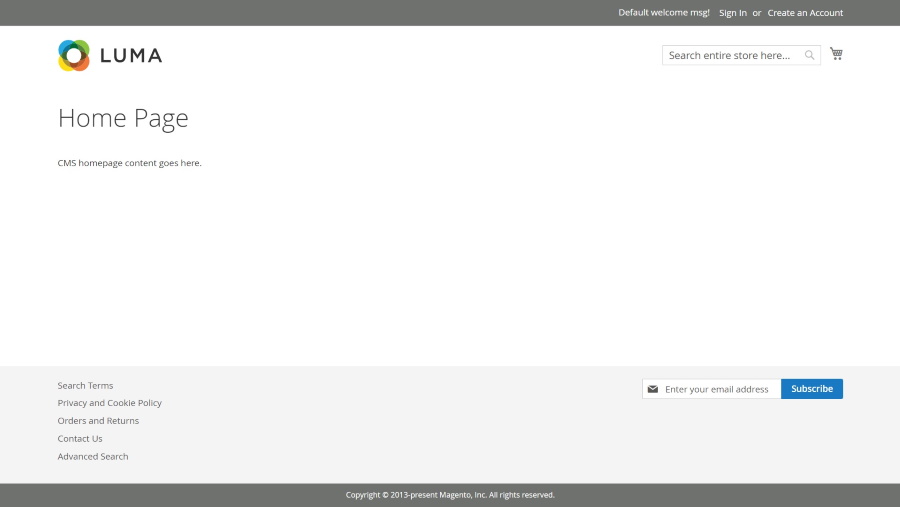
Open your browser and type your domain e.g http://your-domain.com
Comments and Conclusion
That’s it. You have successfully installed Open Source version of Magento 2.4.4 on Debian 11.
If you have any questions please leave a comment below.