
SuiteCRM is a free and open-source Customer Relationship Management (CRM) platform that is designed to help businesses to manage their customer relationships, sales, marketing, and customer support activities.
It is a popular choice for organizations looking for a cost-effective CRM solution with extensive customization options.
In this tutorial, we will show you how to install SuiteCRM on Debian 12.
Step 1: Update Operating System
The first step is to ensure that your system is up-to-date. You can do this by running the following command:
# apt update && apt upgradeStep 2: Install Apache Web Server
To install Apache, run the following command:
# apt install apache2You can start the Apache service and configure it to run on startup by entering the following commands:
# systemctl start apache2
# systemctl enable apache2
Verify the status of the Apache service using systemctl status command:
# systemctl status apache2Output:
● apache2.service - The Apache HTTP Server
     Loaded: loaded (/lib/systemd/system/apache2.service; enabled; preset: enabled)
     Active: active (running)
       Docs: https://httpd.apache.org/docs/2.4/
    Process: 2024 ExecStart=/usr/sbin/apachectl start (code=exited, status=0/SUCCESS)
   Main PID: 2028 (apache2)
      Tasks: 7 (limit: 2273)
     Memory: 19.2M
        CPU: 180ms
     CGroup: /system.slice/apache2.service
             ├─2028 /usr/sbin/apache2 -k start
             ├─2029 /usr/sbin/apache2 -k start
             ├─2030 /usr/sbin/apache2 -k start
Step 3: Install PHP and PHP extensions for SuiteCRM
By default, Debian12 comes with PHP version 8.2. To install PHP and the necessary extensions, run the following command:
# apt install php php-cli libapache2-mod-php php-json php-common php-mysql php-zip php-gd php-imap php-mbstring php-curl php-xml php-ldap php-pearOnce the installation is complete verify if PHP is installed:
php -vOutput:
PHP 8.2.7 (cli) (built: Jun 9 2023 19:37:27) (NTS)
Copyright (c) The PHP Group
Zend Engine v4.2.7, Copyright (c) Zend Technologies
with Zend OPcache v8.2.7, Copyright (c), by Zend TechnologiesThen edit the php.ini file:
# nano /etc/php/8.2/apache2/php.iniChange the following settings:
memory_limit = 256M
post_max_size = 32M
upload_max_filesize = 32M
Restart the Apache service to apply the changes:
# systemctl restart apache2Step 4: Install MariaDB and create a database
You can install the MariaDB server with the following command:
# apt install mariadb-server mariadb-clientStart the database server daemon, and also enable it to start automatically at the next boot with the following commands:
# systemctl start mariadb
# systemctl enable mariadb
Verify the status of the MariaDB service using systemctl status command:
# systemctl status mariadbOutput:
● mariadb.service - MariaDB 10.11.3 database server
     Loaded: loaded (/lib/systemd/system/mariadb.service; enabled; preset: enabled)
     Active: active (running)
       Docs: man:mariadbd(8)
             https://mariadb.com/kb/en/library/systemd/
   Main PID: 774 (mariadbd)
     Status: "Taking your SQL requests now..."
      Tasks: 9 (limit: 2273)
     Memory: 245.4M
        CPU: 5.791s
     CGroup: /system.slice/mariadb.service
             └─774 /usr/sbin/mariadbd
By default, MariaDB is not hardened. You can secure MariaDB using the mysql_secure_installation script.
# mysql_secure_installationConfigure it like this:
- Set root password? [Y/n] Y
- Remove anonymous users? [Y/n] Y
- Disallow root login remotely? [Y/n] Y
- Remove test database and access to it? [Y/n] Y
- Reload privilege tables now? [Y/n] Y
Now run the command below to log in to the MariaDB shell.
# mysql -u root -pOnce you are logged in to your database server you need to create a database for the SuiteCRM installation:
MariaDB [(none)]> CREATE DATABASE suitecrm;
MariaDB [(none)]> CREATE USER 'suitecrm'@'localhost' IDENTIFIED BY 'Str0ng-Passw0rd';
MariaDB [(none)]> GRANT ALL PRIVILEGES ON suitecrm.* TO 'suitecrm'@'localhost';
MariaDB [(none)]> FLUSH PRIVILEGES;
MariaDB [(none)]> EXIT;Step 5: Download SuiteCRM
Download the latest stable version of SuiteCRM from the SuiteCRM website using the following command:
# wget https://suitecrm.com/download/141/suite714/562969/suitecrm-7-14-0.zipUnzip the downloaded release file with the following command:
# unzip suitecrm-7-14-0.zipRename it to make it simpler:
# mv /var/www/SuiteCRM-7.14.0/ /var/www/suitecrmEnable permission for the Apache webserver user to access the files:
# chown -R www-data:www-data /var/www/suitecrm/Step 6: Create Virtualhost for SuiteCRM
Then, create an virtual host configuration file to host SuiteCRM:
# nano /etc/apache2/sites-available/suitecrm.confPaste the content as shown below:
<VirtualHost *:80>
    ServerAdmin admin@your-domain.com
    DocumentRoot /var/www/suitecrm
    ServerName suitecrm.your-domain.com

    <Directory /var/www/suitecrm/>
	Options Indexes FollowSymLinks
	AllowOverride All
	Require all granted
    </Directory>

    ErrorLog /var/log/apache2/your-domain.com-error_log
    CustomLog /var/log/apache2/your-domain.com-access_log common
</VirtualHost>
Remember to replace suitecrm.your-domain.com with the domain name of your server.
Save and exit the configuration file.
Then enable the "rewrite" module in Apache:
# /usr/sbin/a2enmod rewriteTo enable this site run the command:
To enable this site run the command:
# /usr/sbin/a2ensite suitecrm.confTo implement the changes, restart Apache webserver:
# systemctl restart apache2Step 7: Access SuiteCRM Web Interface
Go to your browser and visit http://suitecrm.your-domain.com. You should see the following page:
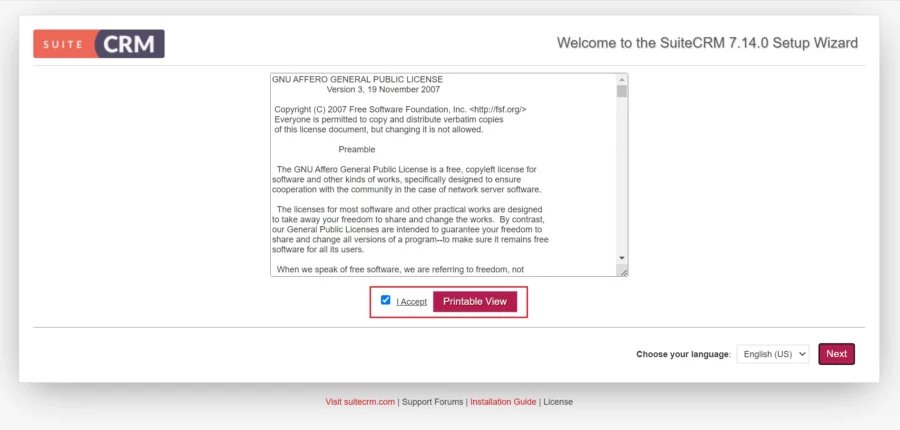
The first page displays the license agreement. Scroll down Accept the License agreement and click Next.
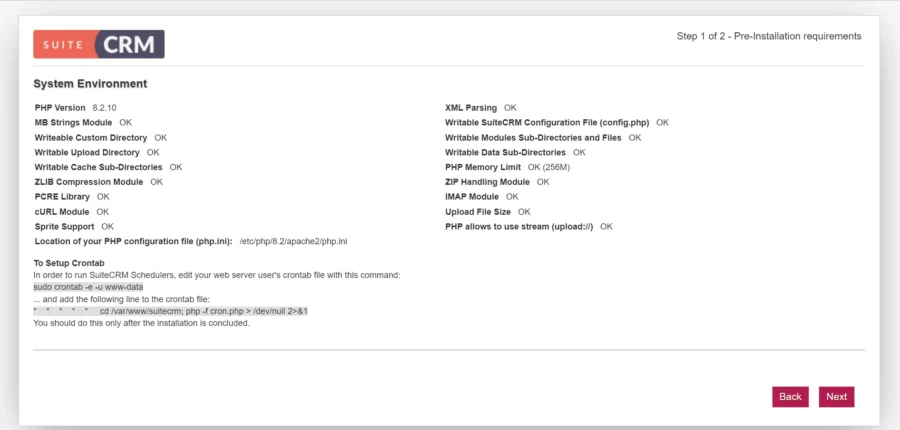
If everything is okay, click the Next button.
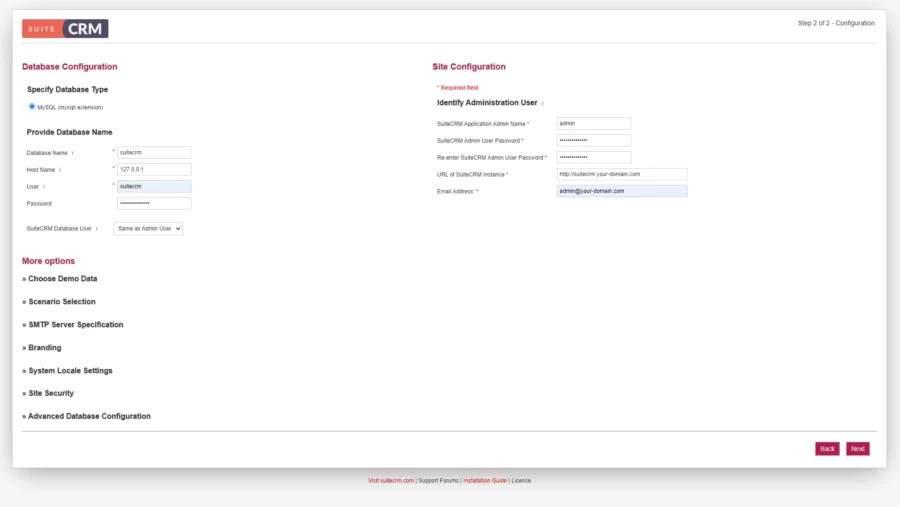
Provide your database name, database username, password, admin username and password. Then, click on the Next button.
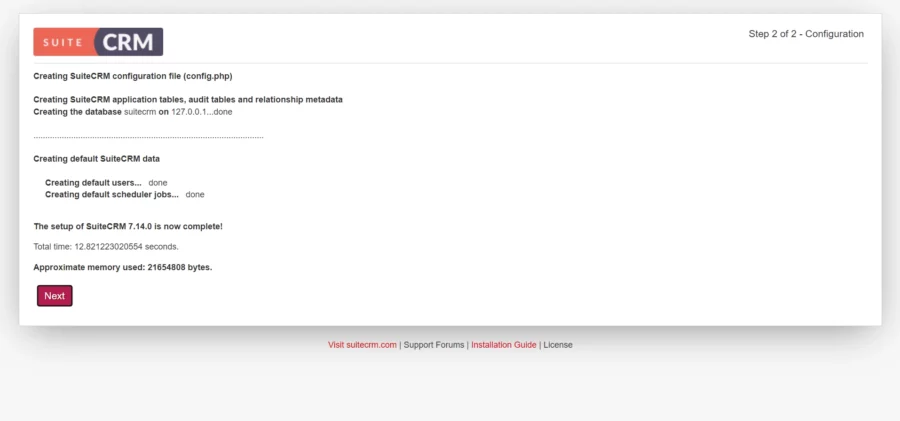
You are presented with the details of SuiteCRM configuration completion. Click the Next button and you should see the login page:
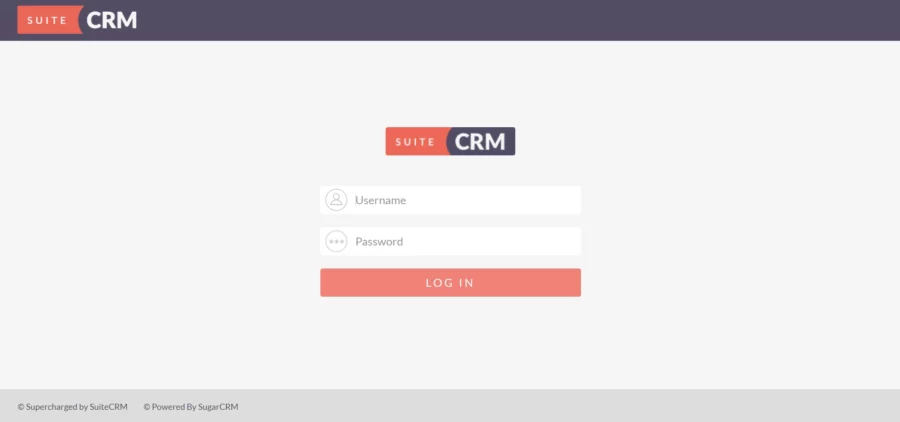
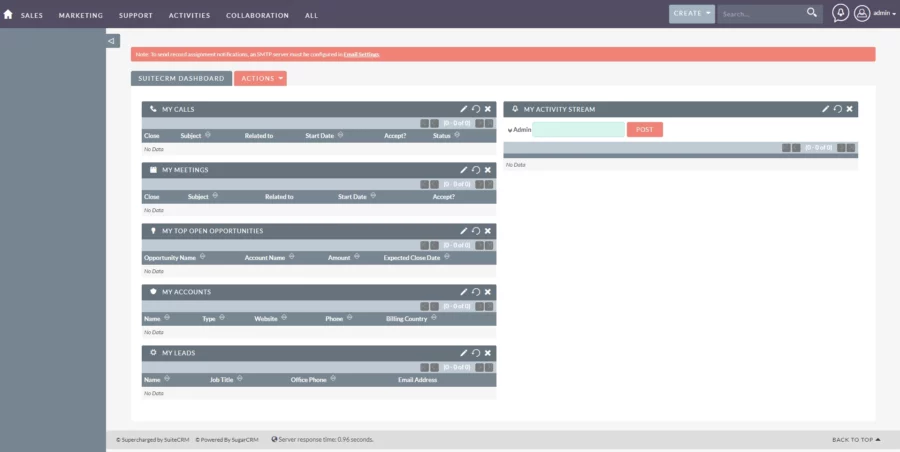
Provide your admin credential and click on the LOG IN button, you should see the SuiteCRM dashboard in the following page:
Step 8: Set up Cron Jobs
SuiteCRM needs cron jobs to function properly. Edit the www-data user’s crontab file.
# sudo crontab -e -u www-dataAdd the following line at the end of the file.
* * * * * cd /var/www/suitecrm; php -f cron.php > /dev/null 2>&1Save and close the file.
Comments and Conclusion
That’s it. You have successfully installed SuiteCRM on Debian 12.
For additional help or useful information, we recommend you to check the official SuiteCRM documentation.
If you have any questions please leave a comment below.