
PrestaShop is an open-source platform that allows anybody to easily create an e-commerce website platform to start selling products. The software was created with PHP and released under the Open Software License (OSL).
In this tutorial, we will explain how to install and configure the PrestaShop e-commerce platform on Ubuntu 22.04.
Step 1: Update Operating System
Update your Ubuntu 22.04 operating system to the latest version with the following command:
$ sudo apt update && sudo apt upgrade -yStep 2: Install Nginx webserver
You can install it via apt package manager by executing the following command.
$ sudo apt install nginxYou can start the Nginx service and configure it to run on startup by entering the following commands:
$ sudo systemctl start nginx
$ sudo systemctl enable nginx
Verify the status of the Nginx service using systemctl status command:
$ sudo systemctl status nginxOutput:
● nginx.service - A high performance web server and a reverse proxy server
     Loaded: loaded (/lib/systemd/system/nginx.service; enabled; vendor preset: enabled)
     Active: active (running)
       Docs: man:nginx(8)
    Process: 835 ExecStartPre=/usr/sbin/nginx -t -q -g daemon on; master_process on; (code=exited, status=0/SUCCESS)
    Process: 1059 ExecStart=/usr/sbin/nginx -g daemon on; master_process on; (code=exited, status=0/SUCCESS)
   Main PID: 1060 (nginx)
      Tasks: 2 (limit: 2200)
     Memory: 7.9M
        CPU: 94ms
     CGroup: /system.slice/nginx.service
             ├─1060 "nginx: master process /usr/sbin/nginx -g daemon on; master_process on;"
             └─1061 "nginx: worker process"
Step 3: Install PHP and PHP extensions for PrestaShop
By default, Ubuntu 22.04 comes with PHP version 8.1.
However, PrestaShop requirement PHP7.4. So you will need to add the DEB.SURY.ORG repository to APT.
$ sudo apt install software-properties-common$ sudo add-apt-repository ppa:ondrej/php -yTo install PHP and additional PHP modules to support PrestaShop, run the following command:
$ sudo apt-get install php7.4 php7.4-{cli,fpm,common,curl,zip,gd,mysql,xml,mbstring,json,intl}Verify if PHP is installed.
php7.4 -vOutput:
PHP 7.4.30 (cli) (built: Aug 1 2022 15:06:35) ( NTS )
Copyright (c) The PHP Group
Zend Engine v3.4.0, Copyright (c) Zend Technologies
with Zend OPcache v7.4.30, Copyright (c), by Zend Technologies
After installing all the packages, edit the php.ini file:
$ sudo nano /etc/php/7.4/fpm/php.iniChange the following settings per your requirements:
memory_limit = 512M
post_max_size = 32M
upload_max_filesize = 32M
date.timezone = America/Chicago
Step 4: Install MariaDB and create a database
MariaDB is a free and opensource database engine that is flexible, robust and easy-to-use. To install MariaDB run the following command:
$ sudo apt install mariadb-server mariadb-clientVerify the status of the MariaDB service using systemctl status command:
$ sudo systemctl status mariadbOutput:
● mariadb.service - MariaDB 10.6.7 database server
     Loaded: loaded (/lib/systemd/system/mariadb.service; enabled; vendor preset: enabled)
     Active: active (running)
       Docs: man:mariadbd(8)
             https://mariadb.com/kb/en/library/systemd/
   Main PID: 22956 (mariadbd)
     Status: "Taking your SQL requests now..."
      Tasks: 9 (limit: 2200)
     Memory: 57.0M
        CPU: 447ms
     CGroup: /system.slice/mariadb.service
             └─22956 /usr/sbin/mariadbd
By default, MariaDB is not hardened. You can secure MariaDB using the mysql_secure_installation script.
$ sudo mysql_secure_installationConfigure it like this:
- Set root password? [Y/n] Y
- Remove anonymous users? [Y/n] Y
- Disallow root login remotely? [Y/n] Y
- Remove test database and access to it? [Y/n] Y
- Reload privilege tables now? [Y/n] Y
Now run the command below to log in to the MariaDB shell.
$ sudo mysql -u root -pOnce you are logged in to your database server you need to create a database for the PrestaShop installation:
MariaDB [(none)]> CREATE DATABASE prestashop;
MariaDB [(none)]> CREATE USER 'prestashop'@'localhost' IDENTIFIED BY 'Str0ngWedrf1';
MariaDB [(none)]> GRANT ALL PRIVILEGES ON prestashop. * TO 'prestashop'@'localhost';
MariaDB [(none)]> FLUSH PRIVILEGES;
MariaDB [(none)]> exit;
Step 5: Download PrestaShop
The latest version of PrestaShop is available to download from their website. As of writing this tutorial, the latest version available is 1.7.8.7.
$ sudo wget https://www.prestashop.com/en/system/files/ps_releases/prestashop_1.7.8.7.zipThen extract file into the folder /var/www/prestashop/ with the following command:
$ sudo apt -y install unzip
$ sudo unzip prestashop_1.7.8.7.zip -d /var/www/prestashop/
Enable permission for the Nginx webserver user to access the files:
$ sudo chown -R www-data:www-data /var/www/prestashop/Step 6: Configure Nginx for PrestaShop
Run the commands below to create a new VirtualHost file called prestashop in the /etc/nginx/conf.d/ directory.
$ sudo nano /etc/nginx/conf.d/prestashop.confPaste the content as shown below:
server {
    listen 80;
    server_name your-domain.com;

    access_log /var/log/nginx/your-domain.com-access.log;
    error_log /var/log/nginx/your-domain.com-error.log;

    root /var/www/prestashop;

    index index.php;

    client_max_body_size 16M;

    error_page 404 /index.php?controller=404;

    rewrite ^/(\d)(-[\w-]+)?/.+\.jpg$ /img/p/$1/$1$2.jpg last;
    rewrite ^/(\d)(\d)(-[\w-]+)?/.+\.jpg$ /img/p/$1/$2/$1$2$3.jpg last;
    rewrite ^/(\d)(\d)(\d)(-[\w-]+)?/.+\.jpg$ /img/p/$1/$2/$3/$1$2$3$4.jpg last;
    rewrite ^/(\d)(\d)(\d)(\d)(-[\w-]+)?/.+\.jpg$ /img/p/$1/$2/$3/$4/$1$2$3$4$5.jpg last;
    rewrite ^/(\d)(\d)(\d)(\d)(\d)(-[\w-]+)?/.+\.jpg$ /img/p/$1/$2/$3/$4/$5/$1$2$3$4$5$6.jpg last;
    rewrite ^/(\d)(\d)(\d)(\d)(\d)(\d)(-[\w-]+)?/.+\.jpg$ /img/p/$1/$2/$3/$4/$5/$6/$1$2$3$4$5$6$7.jpg last;
    rewrite ^/(\d)(\d)(\d)(\d)(\d)(\d)(\d)(-[\w-]+)?/.+\.jpg$ /img/p/$1/$2/$3/$4/$5/$6/$7/$1$2$3$4$5$6$7$8.jpg last;
    rewrite ^/(\d)(\d)(\d)(\d)(\d)(\d)(\d)(\d)(-[\w-]+)?/.+\.jpg$ /img/p/$1/$2/$3/$4/$5/$6/$7/$8/$1$2$3$4$5$6$7$8$9.jpg last;
    rewrite ^/c/([\w.-]+)/.+\.jpg$ /img/c/$1.jpg last;

    rewrite ^images_ie/?([^/]+)\.(gif|jpe?g|png)$ js/jquery/plugins/fancybox/images/$1.$2 last;

    rewrite ^/api/?(.*)$ /webservice/dispatcher.php?url=$1 last;

    rewrite ^(/install(?:-dev)?/sandbox)/.* /$1/test.php last;

    location / {
        try_files $uri $uri/ /index.php$is_args$args;
    }

    location /admin-dev/ {
        if (!-e $request_filename) {
            rewrite ^ /admin-dev/index.php last;
        }
    }

    location ~ /\. {
        deny all;
    }

    location ~ ^/(app|bin|cache|classes|config|controllers|docs|localization|override|src|tests|tools|translations|var|vendor)/ {
        deny all;
    }

    location ~ ^/modules/.*/vendor/ {
        deny all;
    }

    location ~ \.(log|tpl|twig|sass|yml)$ {
        deny all;
    }

    location /img {
        location ~ \.php$ { deny all; }
    }

    location /upload {
        location ~ \.php$ { deny all; }
    }

    location ~ [^/]\.php(/|$) {
        fastcgi_split_path_info ^(.+?\.php)(/.*)$;

        try_files $fastcgi_script_name =404;

        include fastcgi_params;
        fastcgi_param SCRIPT_FILENAME $request_filename;

        fastcgi_index index.php;

        fastcgi_keep_conn on;
        fastcgi_read_timeout 180s;
        fastcgi_send_timeout 180s;

        fastcgi_pass unix:/var/run/php/php7.4-fpm.sock;
    }
}
Remember to replace your-domain.com with the domain name of your server.
Save and exit the configuration file.
To implement the changes, restart Nginx webserver:
$ sudo systemctl restart nginxStep 7: Access PrestaShop Web Interface
Open your web browser and type the URL http://your-domain.com. You should see the following page:
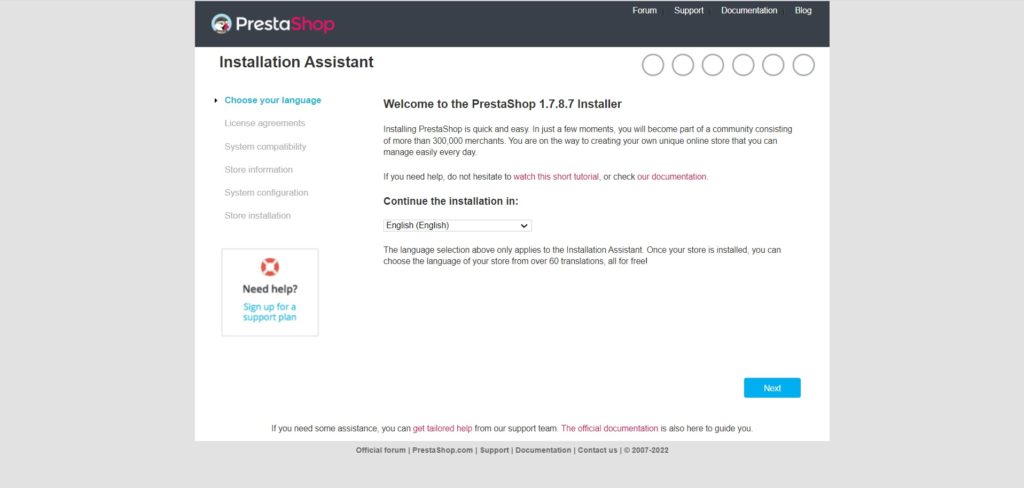
Choose your language and click on Next.
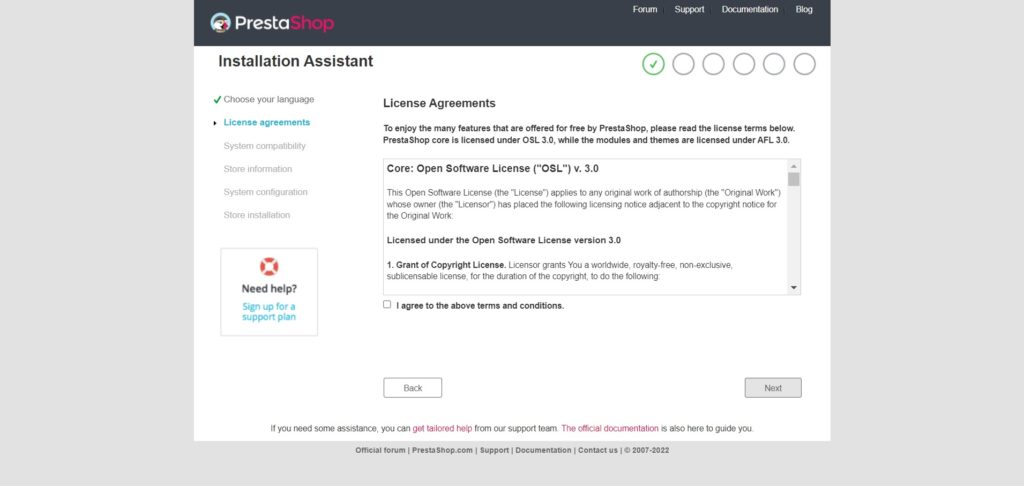
Accept the license and click on the Next.
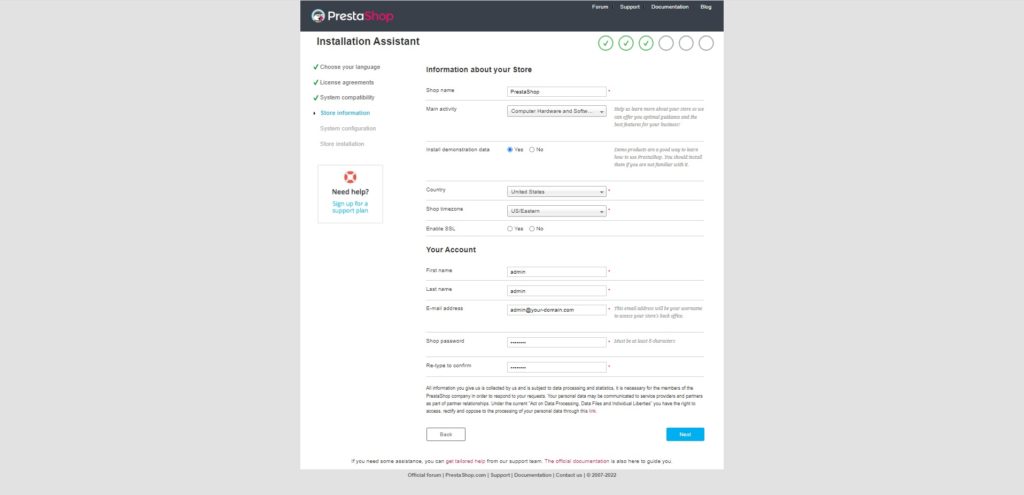
Provide your site information and click on the Next.
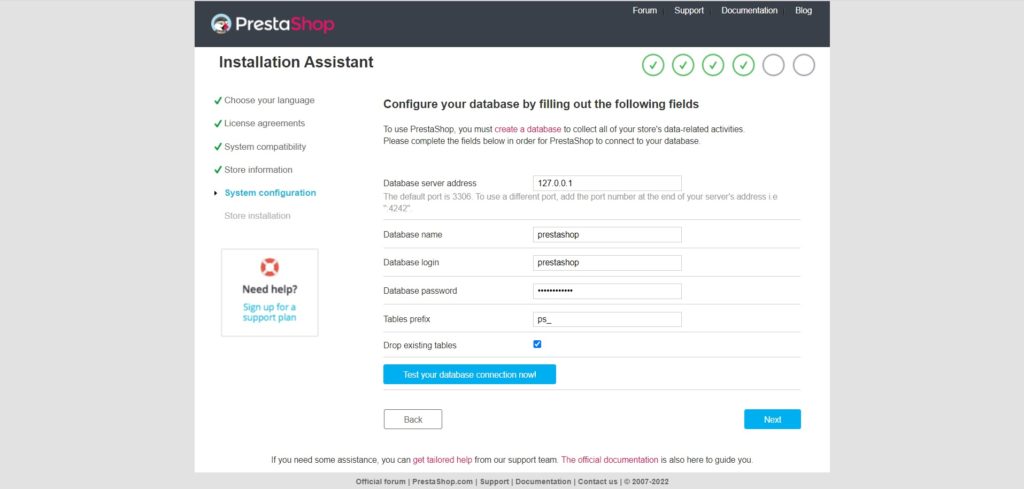
Provide your database information and click on the Next.
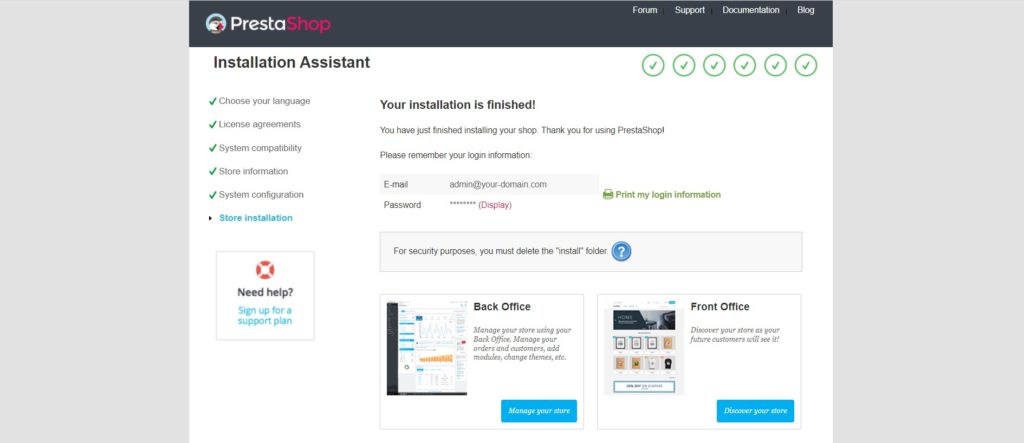
Click on the “Manage your store“. But as we try to login, an error appears “For security reasons, you cannot login to the back office until you delete the installation folder”
To delete the installation folder, run the command below on the server:
$ sudo rm -r /var/www/prestashop/installAfter deleting the folder just refresh the login page and this time you will get the login page.
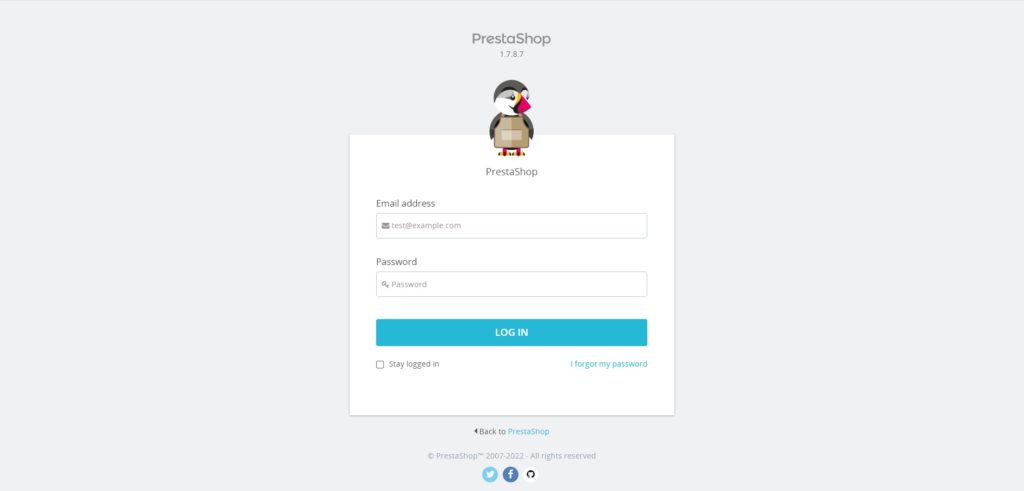
Provide your admin username and password and click on LOG IN. You will be redirected to the dashboard:
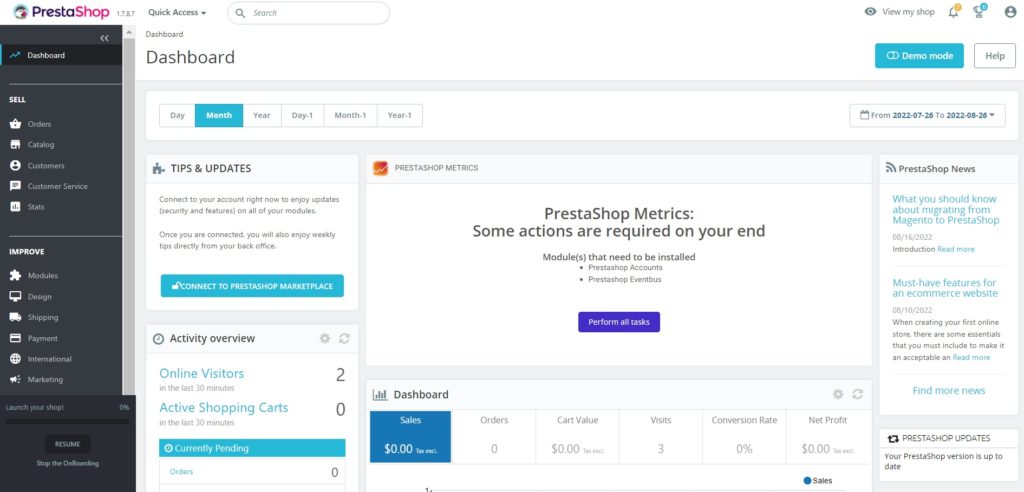
Comments and Conclusion
Congratulations! You have successfully installed PrestaShop e-commerce platform. Thanks for using this tutorial for installing the PrestaShop on your Ubuntu 22.04 OS.