
ownCloud is a powerful an open-source collaboration tool that allows users store and securely share files and folders on a private server.
In this tutorial, we will show you how to install open source version of ownCloud on Ubuntu 22.04.
Step 1: Update Operating System
Update your Ubuntu 22.04 operating system to the latest version with the following command:
# apt update && sudo apt upgrade -yStep 2: Install Apache webserver
You can install it via apt package manager by executing the following command.
# apt install apache2You can start the Nginx service and configure it to run on startup by entering the following commands:
# systemctl start apache2
# systemctl enable apache2
Verify the status of the Apache service using systemctl status command:
# systemctl status apache2Output:
● apache2.service - The Apache HTTP Server
     Loaded: loaded (/lib/systemd/system/apache2.service; enabled; vendor preset: enabled)
     Active: active (running)
       Docs: https://httpd.apache.org/docs/2.4/
    Process: 845 ExecStart=/usr/sbin/apachectl start (code=exited, status=0/SUCCESS)
   Main PID: 998 (apache2)
      Tasks: 6 (limit: 2797)
     Memory: 27.4M
        CPU: 420ms
     CGroup: /system.slice/apache2.service
             ├─ 998 /usr/sbin/apache2 -k start
             ├─1033 /usr/sbin/apache2 -k start
             ├─1034 /usr/sbin/apache2 -k start
             ├─1035 /usr/sbin/apache2 -k start
             ├─1037 /usr/sbin/apache2 -k start
             └─1038 /usr/sbin/apache2 -k start
Step 3: Install PHP and required extensions
The PHP version available to install using the default standard repository of Ubuntu 22.04 is 8.x, however, while doing this article OwnCloud doesn’t support PHP 8.x, hence here we are installing PHP7.4 using Ondrej PPA repo.
To have the required version of PHP, add the Ondrej repository:
# add-apt-repository ppa:ondrej/phpRun system update command:
# apt updateInstall required extensions:
# apt install php7.4 php7.4-{opcache,gd,curl,mysqlnd,intl,json,ldap,mbstring,mysqlnd,xml,zip}Step 4: Install MySQL and create a database
You can install the MySQL server with the following command:
# apt install mysql-serverStart the database server daemon, and also enable it to start automatically at the next boot with the following commands:
# systemctl start mysql
# systemctl enable mysql
Verify the status of the MySQL service using systemctl status command:
# systemctl status mysqlOutput:
● mysql.service - MySQL Community Server
     Loaded: loaded (/lib/systemd/system/mysql.service; enabled; vendor preset: enabled)
     Active: active (running)
   Main PID: 1083 (mysqld)
     Status: "Server is operational"
      Tasks: 41 (limit: 2797)
     Memory: 434.0M
        CPU: 1min 57.932s
     CGroup: /system.slice/mysql.service
             └─1083 /usr/sbin/mysqld
By default, MySQL is not hardened. You can secure MySQL using the mysql_secure_installation script.
# mysql_secure_installationConfigure it like this:
- Set root password? [Y/n] Y
- Remove anonymous users? [Y/n] Y
- Disallow root login remotely? [Y/n] Y
- Remove test database and access to it? [Y/n] Y
- Reload privilege tables now? [Y/n] Y
Now run the command below to log in to the MySQL shell.
# mysql -u root -pOnce you are logged in to your database server you need to create a database for the ownCloud installation:
mysql> CREATE DATABASE owncloud;
mysql> CREATE USER 'owncloud'@'localhost' IDENTIFIED BY 'Str0ngPEd6';
mysql> GRANT ALL PRIVILEGES ON owncloud. * TO 'owncloud'@'localhost';
mysql> FLUSH PRIVILEGES;
mysql> exit;
Step 5: Install ownCloud
The latest version of ownCloud is available to download from their website. You can download it with the following command:
# wget https://download.owncloud.com/server/stable/owncloud-complete-latest.zipExtract file into the folder /var/www/ with the following command:
# unzip owncloud-complete-latest.zip -d /var/www/Create a directory to store the user data:
# mkdir -p /var/www/owncloud/dataChange the ownership of the directory with the command:
# chown -R www-data:www-data /var/www/owncloud/Step 6: Configure Apache for ownCloud
Navigate to /etc/apache2/sites-available directory and run the following command to create a configuration file for your ownCloud installation:
# nano /etc/apache2/sites-available/owncloud.confAdd the following content:
<VirtualHost *:80>

ServerName cloud.your-domain.com

ServerAdmin webmaster@your-domain.com
DocumentRoot /var/www/owncloud

<Directory /var/www/owncloud/>
Options +FollowSymlinks
AllowOverride All
Require all granted
</Directory>

ErrorLog /var/log/apache2/cloud.your-domain.com_error.log
CustomLog /var/log/apache2/cloud.your-domain.com_access.log combined

</VirtualHost>
Save the file and Exit.
Enable the ownCloud virtual host:
# a2ensite owncloud.confRestart the Apache web server.
# systemctl restart apache2Step 7: Access your ownCloud Application
Open your web browser and type the URL http://cloud.your-domain.com. You should see the following page:
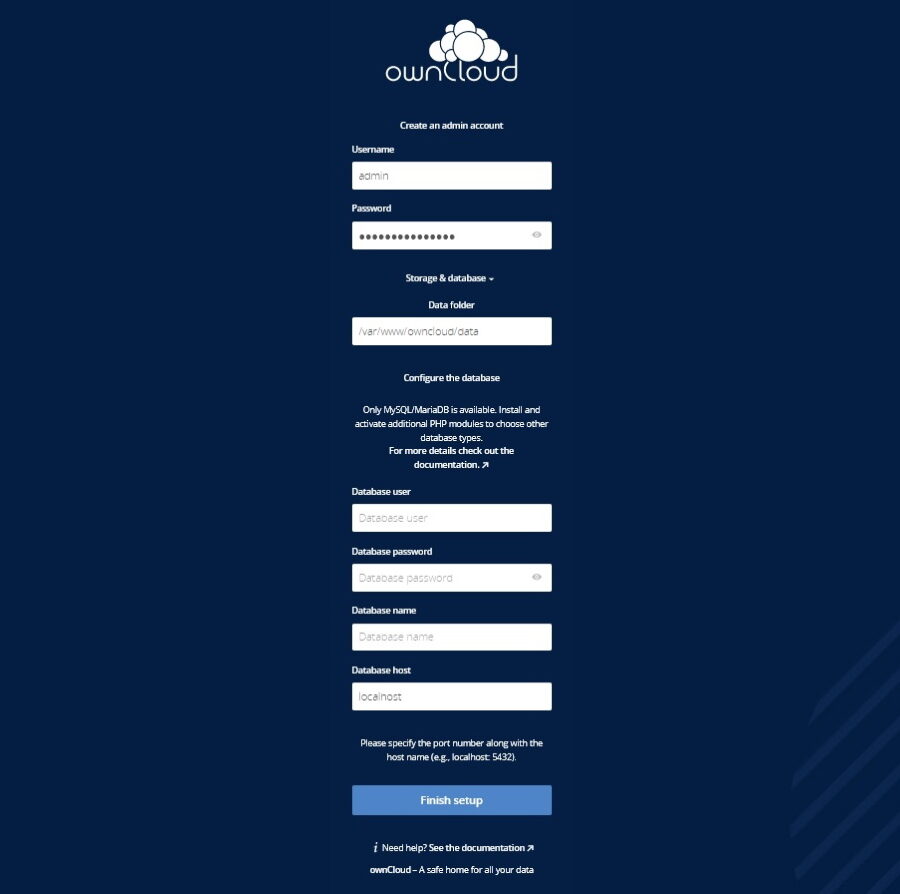
After filling in all the necessary details, click Finish setup and, in less than a minute, the installation will complete and you can then log in as the admin user.
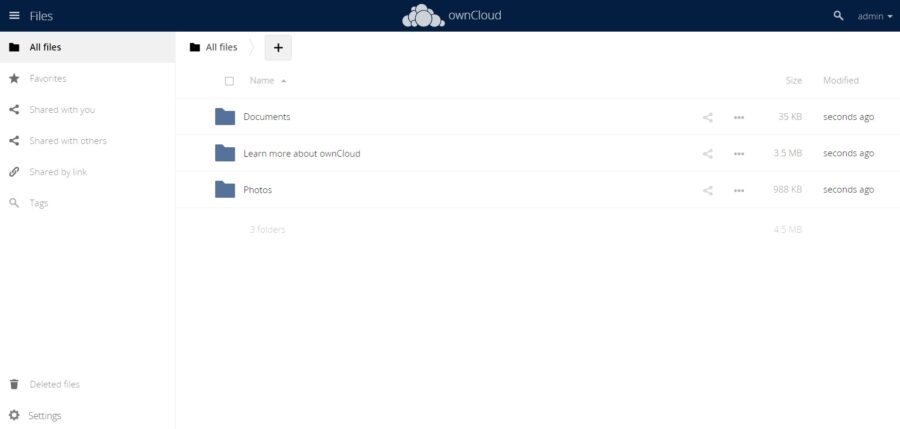
Once logged in, you are taken to the main ownCloud page:
Comments and Conclusion
That’s it. You have successfully installed Open Source version of ownCloud on Ubuntu 22.04.
If you have any questions please leave a comment below.
Really Enjoyed this Tutorial
Typo Step: 6
nano /etc/apache2/sites-available/owncloud.conf
Thank you very much. It is corrected now.
What do I have to change to access it locally with just the IP adress of the server?
when I open “http://192.168.0.179/” I just get “index of /”
when I open “http://192.168.0.179/owncloud/” it gives 404
🙁
You need to change the ServerName with your IP address instead of your domain name for example:
And if still cann’t acces it with your IP address please run this:
sudo ufw allow OpenSSH
sudo ufw allow ‘Apache Full’
sudo ufw enable
Than try again.