
OpenCart is a popular open-source and free to use content management system (CMS) designed for building online stores.
It offers a lot of plugins that help you to extend the platform’s functionality and includes features like user management, multi-store functionality, affiliates, discounts, multiple payment gateways, product reviews, and more.
In this tutorial, we will explain how to install and configure the OpenCart e-commerce platform on Ubuntu 22.04.
Step 1: Update Operating System
Update your Ubuntu 22.04 operating system to the latest version with the following command:
$ sudo apt update && sudo apt upgrade -yStep 2: Install Apache webserver
The Apache HTTP Server is a free and open-source cross-platform web server. You can install it via apt package manager by executing the following command.
$ sudo apt install apache2You can start the Apache service and configure it to run on startup by entering the following commands:
$ sudo systemctl start apache2
$ sudo systemctl enable apache2
Verify the status of the Apache service using systemctl status command:
$ sudo systemctl status apache2Output:
● apache2.service - The Apache HTTP Server
     Loaded: loaded (/lib/systemd/system/apache2.service; enabled; vendor preset: enabled)
     Active: active (running)
       Docs: https://httpd.apache.org/docs/2.4/
   Main PID: 2975 (apache2)
      Tasks: 55 (limit: 2200)
     Memory: 4.8M
        CPU: 137ms
     CGroup: /system.slice/apache2.service
             ├─2975 /usr/sbin/apache2 -k start
             ├─2977 /usr/sbin/apache2 -k start
             └─2978 /usr/sbin/apache2 -k start
Step 3: Install PHP
To install PHP and additional PHP modules to support OpenCart, run the following command:
$ sudo apt-get install php php-cli libapache2-mod-php php-common php-mbstring php-gd php-intl php-xml php-mysql php-zip php-curl php-xmlrpcVerify if PHP is installed.
php -vOutput:
PHP 8.1.2 (cli) (built: Jun 13 2022 13:52:54) (NTS)
Copyright (c) The PHP Group
Zend Engine v4.1.2, Copyright (c) Zend Technologies
with Zend OPcache v8.1.2, Copyright (c), by Zend Technologies
Step 4: Install MariaDB and create a database
MariaDB is a free and opensource database engine that is flexible, robust and easy-to-use. To install MariaDB run the following command:
$ sudo apt install mariadb-server mariadb-clientVerify the status of the MariaDB service using systemctl status command:
$ sudo systemctl status mariadbOutput:
● mariadb.service - MariaDB 10.6.7 database server
     Loaded: loaded (/lib/systemd/system/mariadb.service; enabled; vendor preset: enabled)
     Active: active (running)
       Docs: man:mariadbd(8)
             https://mariadb.com/kb/en/library/systemd/
    Process: 26067 ExecStartPre=/usr/bin/install -m 755 -o mysql -g root -d /var/run/mysqld (code=exited, status=0/SUCCESS)
    Process: 26069 ExecStartPre=/bin/sh -c systemctl unset-environment _WSREP_START_POSITION (code=exited, status=0/SUCCESS)
    Process: 26072 ExecStartPre=/bin/sh -c [ ! -e /usr/bin/galera_recovery ] && VAR= ||   VAR=`cd /usr/bin/..; /usr/bin/galera_recovery`; [ $? -eq 0 ]   && >
    Process: 26149 ExecStartPost=/bin/sh -c systemctl unset-environment _WSREP_START_POSITION (code=exited, status=0/SUCCESS)
    Process: 26151 ExecStartPost=/etc/mysql/debian-start (code=exited, status=0/SUCCESS)
   Main PID: 26109 (mariadbd)
     Status: "Taking your SQL requests now..."
      Tasks: 7 (limit: 2200)
     Memory: 61.3M
        CPU: 2.585s
     CGroup: /system.slice/mariadb.service
             └─26109 /usr/sbin/mariadbd
By default, MariaDB is not hardened. You can secure MariaDB using the mysql_secure_installation script.
$ sudo mysql_secure_installationConfigure it like this:
- Set root password? [Y/n] Y
- Remove anonymous users? [Y/n] Y
- Disallow root login remotely? [Y/n] Y
- Remove test database and access to it? [Y/n] Y
- Reload privilege tables now? [Y/n] Y
Now run the command below to log in to the MariaDB shell.
$ sudo mysql -u root -pOnce you are logged in to your database server you need to create a database for the OpenCart installation:
MariaDB [(none)]> CREATE DATABASE opencart;
MariaDB [(none)]> CREATE USER 'opencart'@'localhost' IDENTIFIED BY 'Your-Strong-Password';
MariaDB [(none)]> GRANT ALL PRIVILEGES ON opencart . * TO 'opencart'@'localhost';
MariaDB [(none)]> FLUSH PRIVILEGES;
MariaDB [(none)]> exit;
Step 5: Download OpenCart
You can download the latest version of OpenCart from the Git repository using the following command:
$ sudo wget https://github.com/opencart/opencart/releases/download/4.0.0.0/opencart-4.0.0.0.zipThen extract file into the folder /var/www/html/opencart/ with the following command:
$ sudo apt -y install unzip
$ sudo unzip opencart-4.0.0.0.zip -d /var/www/html/opencart/
Copy OpenCart configuration files:
$ sudo cp /var/www/html/opencart/upload/{config-dist.php,config.php}

$ sudo cp /var/www/html/opencart/upload/admin/{config-dist.php,config.php}
Enable permission for the Apache webserver user to access the files:
$ sudo chown -R www-data:www-data /var/www/html/opencart/Step 6: Create Virtualhost for Opencart
Then, create an virtual host configuration file to host OpenCart:
$ sudo nano /etc/apache2/sites-available/opencart.confPaste the content as shown below:
<VirtualHost *:80>
    ServerAdmin admin@your-domain.com
    DocumentRoot /var/www/html/opencart/upload/
    ServerName your-domain.com
    ServerAlias www.your-domain.com

    <Directory /var/www/html/opencart/upload/>
        Options FollowSymLinks
        AllowOverride All
        Order allow,deny
        Allow from all
    </Directory>

    ErrorLog /var/log/apache2/your-domain.com-error_log
    CustomLog /var/log/apache2/your-domain.com-access_log common
</VirtualHost>
Remember to replace your-domain.com with the domain name of your server.
Save and exit the configuration file.
To enable this site run the command:
$ sudo a2ensite opencart.confTo implement the changes, restart Apache webserver:
$ sudo systemctl restart apache2Step 7: Access OpenCart Web Interface
To access the OpenCart Web Interface, go to your browser and visit http://your-domain.com/.
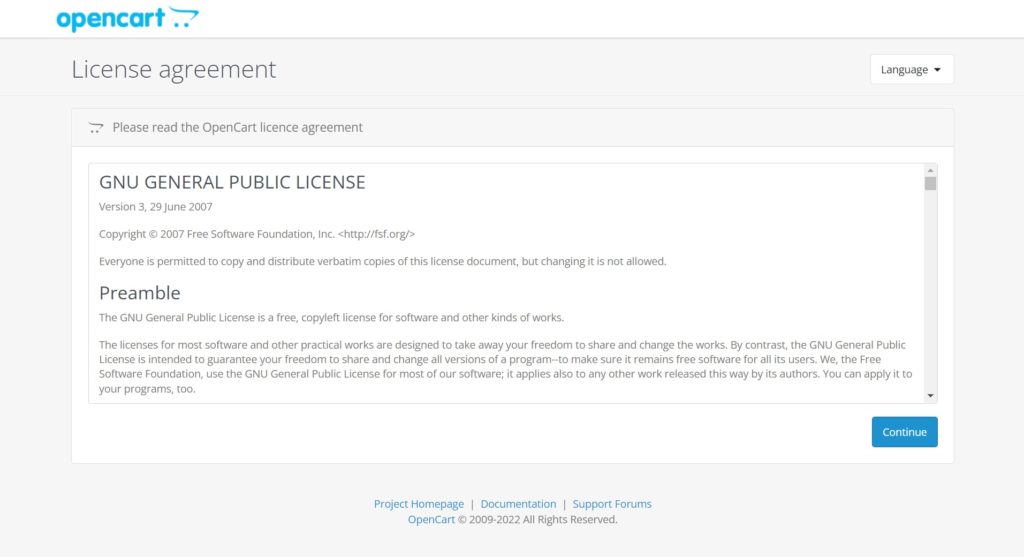
The first page displays the license agreement. Scroll down and click Continue.
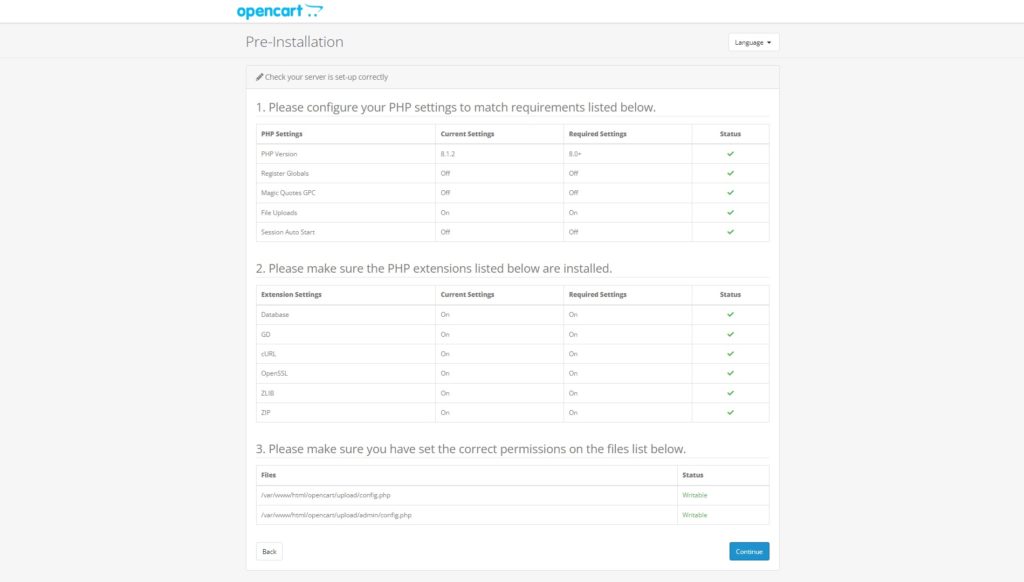
Make sure all the required PHP extensions are installed then click on the Continue button.
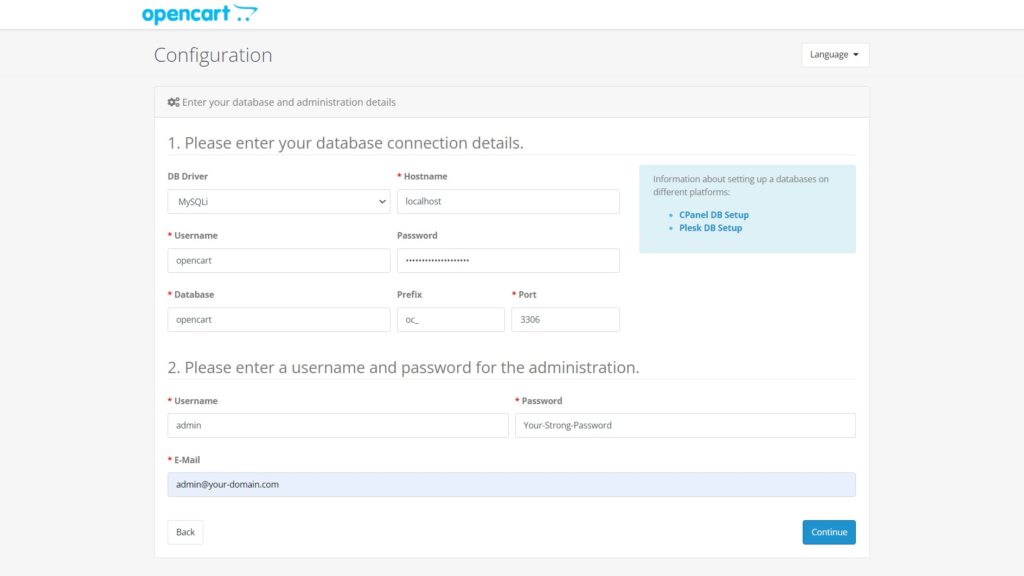
The next page will require you to fill in the database details. Enter the details you defined in the MariaDB database and click Continue.
Once the installation has been completed, you should see the following page:

Then if you click on the Go to your Online Shop you should see your shop page:

Or if you click on the Login to your Administration button you should see the login page:
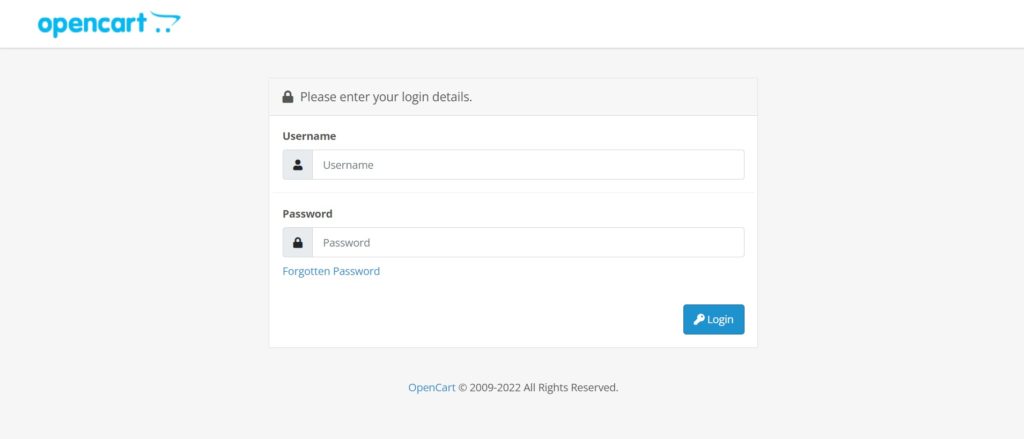
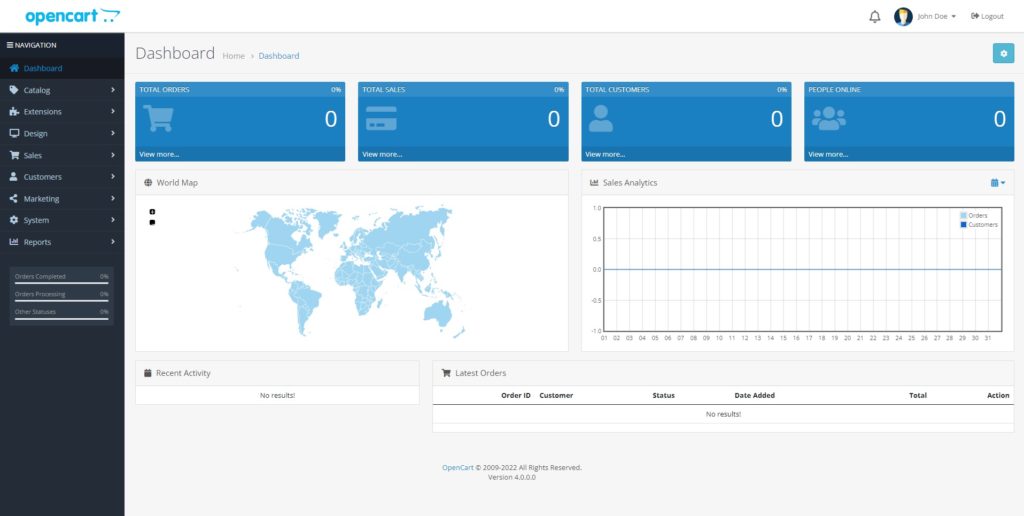
Provide your admin username, password and click on the Login button. You should see your administration panel:
Now, open your terminal and remove the installation directory with the following command:
$ sudo rm -rf /var/www/html/opencart/upload/install/Comments and Conclusion
Congratulations! You have successfully installed OpenCart. Thanks for using this tutorial for installing the OpenCart on Ubuntu 22.04 OS. For additional help or useful information, we recommend you to check the official OpenCart website.
Great! but my admin panel does not work. It always throws an error ” No match for Username and/or Password.” my opencart version is 3.0.3.6, PHP 8.0 I would appreciate your help.
Please make sure that use correct username and password.
I used the correct username and password and tried installation 3 times but had no luck.
I even tried the same on mac (MAMP) same issue here as well.
Your issue is with php version for opencart version 3 you need to use php 7
for opencart version 4 use php 8
You can check the logs for more information about your problem.
Thanks a Lot.
This opencart installation tutorial was of immense help.
The steps worked beautifully and I was able to get the sample OpenCart site up and running.
No errors encountered in the installation steps.
Installation Details:
Linux Mint 21 – Cinnamon – 64-bit
OpenCart 4.0.1.1
Once again thank you for taking the time to published this OpenCart Tutorial.