
Craft CMS is a popular content management system (CMS) that allows users to create and manage websites and digital experiences. It is known for its flexibility, powerful features, and user-friendly interface. Craft CMS is developed by Pixel & Tonic, a software development company.
In terms of performance and scalability, Craft CMS is designed to handle websites of all sizes, from small blogs to large enterprise solutions. It utilizes a modern technology stack and provides caching mechanisms to optimize page loading times.
The Craft Plugin Store offers a wide range of plugins for various purposes, such as e-commerce, SEO optimization, analytics, and integrations with third-party services.
In this tutorial, we will guide you through the process of installing Craft CMS on Debian 12 OS.
Step 1: Update Operating System
The first step is to ensure that your system is up-to-date. You can do this by running the following command:
# apt update && sudo apt upgradeAlso, install necessary packages.
# apt install sudo nano wget unzip zipNow create a new non-root user account with sudo privileges and switch to it.
# /usr/sbin/adduser craftcms

# /usr/sbin/usermod -aG sudo craftcms

# su - craftcms
NOTE: You can replace craftcms with your username.
Step 2: Install Nginx Web Server
Craft CMS requires a web server to run, and we will be using the Nginx web server in this tutorial. To install Nginx, run the following command:
$ sudo apt install nginxYou can start the Nginx service and configure it to run on startup by entering the following commands:
$ sudo systemctl start nginx
$ sudo systemctl enable nginx
Verify the status of the Nginx service using systemctl status command:
$ sudo systemctl status nginxStep 3: Install PHP and PHP extensions for Craft CMS
To install PHP and additional PHP modules to support Craft CMS, run the following command:
$ sudo apt install php php-cli php-common php-json php-gmp php-fpm php-xmlrpc php-bcmath php-imagick php-curl php-zip php-gd php-mysql php-xml php-mbstring php-xmlrpc php-intlVerify if PHP is installed.
php -vOutput:
PHP 8.2.7 (cli) (built: Jun 9 2023 19:37:27) (NTS)
Copyright (c) The PHP Group
Zend Engine v4.2.7, Copyright (c) Zend Technologies
with Zend OPcache v8.2.7, Copyright (c), by Zend Technologies
After installing all the packages, edit the php.ini file:
$ sudo nano /etc/php/8.2/fpm/php.iniChange the following settings per your requirements:
max_execution_time = 300
memory_limit = 512M
post_max_size = 128M
upload_max_filesize = 128M
date.timezone = America/Chicago
To implement the changes, restart the php-fpm service:
$ sudo systemctl restart php8.2-fpmStep 4: Install Composer dependency manager
To install Composer, run the following commands:
$ sudo curl -sS https://getcomposer.org/installer | php
$ sudo mv composer.phar /usr/local/bin/composer
Verify that Composer has been installed successfully by running the following command:
$ composer --version
Composer version 2.5.8 2023-06-09 17:13:21
Step 5: Install MariaDB database server
To install the MariaDB database server, run the following command:
$ sudo apt install mariadb-server mariadb-clientVerify the status of the MariaDB service using systemctl status command:
$ sudo systemctl status mariadbStep 6: Create a New Database for Craft CMS
Once you have installed MariaDB, you’ll need to create a new database and user for Craft CMS to use.
To do this, log in to your MariaDB server using the following command:
$ sudo mysql -u rootRun the following commands to create a new database and user:
MariaDB [(none)]> CREATE DATABASE craftcms;
MariaDB [(none)]> GRANT ALL PRIVILEGES ON craftcms.* TO 'craft'@'localhost' IDENTIFIED BY 'password';
MariaDB [(none)]> FLUSH PRIVILEGES;
MariaDB [(none)]> EXIT;
Note: Make sure to replace 'password' with a strong password of your choice.
Step 7: Download and Install Craft CMS
Create a new directory for your Craft CMS installation using the following command:
$ sudo mkdir /var/www/craftcmsChange ownership of the /var/www/craft directory to the craftcmsuser.
$ sudo chown -R craftcms:craftcms /var/www/craftcmsThen download the latest stable release of Craft CMS from the command line:
$ cd /var/www/craftcms
$ composer create-project craftcms/craft .
You will be asked to provide database details, admin username, password, site URL as shown below:
Are you ready to begin the setup? (yes|no) [no]:yes
Which database driver are you using? (mysql or pgsql) [mysql] mysql
Database server name or IP address: [127.0.0.1] 127.0.0.1
Database port: [3306] 3306
Database username: [root] craft
Database password: password
Database name: craftcms
Database table prefix:
Install Craft now? (yes|no) [yes]:yes

Username: [admin] admin
Email: admin@your-domain.com
Password:
Confirm:
Site name: Your Website
Site URL: http://your-domain.com
Site language: [en-US]
Change ownership of the /var/www/craftcms directory to www-data.
$ sudo chown -R www-data:www-data /var/www/craftcmsStep 8: Configure Nginx for Craft CMS
Run the commands below to create a new VirtualHost file called craftcms in the /etc/nginx/conf.d/ directory.
$ sudo nano /etc/nginx/conf.d/craftcms.confPaste the content as shown below:
server {

  listen 80;

  server_name your-domain.com www.your-domain.com;
  root /var/www/craftcms/web;
  index index.html index.htm index.php;
  charset utf-8;

  location / {
    try_files $uri/index.html $uri $uri/ /index.php?$query_string;
  }

  location ~ [^/]\.php(/|$) {
    try_files $uri $uri/ /index.php?$query_string;
    fastcgi_split_path_info ^(.+\.php)(/.+)$;
    fastcgi_pass unix:/var/run/php/php8.2-fpm.sock;
    fastcgi_index index.php;
    include fastcgi_params;
    fastcgi_param SCRIPT_FILENAME $document_root$fastcgi_script_name;
    fastcgi_param PATH_INFO $fastcgi_path_info;
    fastcgi_param HTTP_PROXY "";
  }
}
Remember to replace your-domain.com with the domain name of your server.
Save and exit the configuration file.
To implement the changes, restart Nginx webserver:
$ sudo systemctl restart nginxStep 9: Access Craft CMS Web Interface
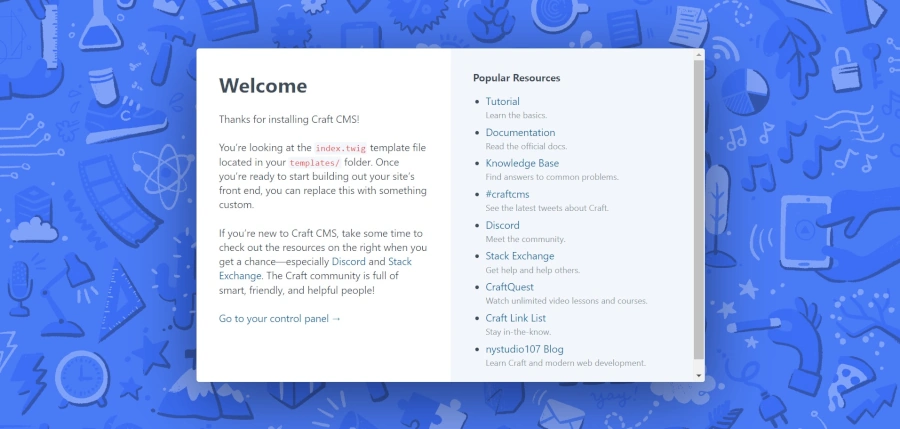
Open your web browser and type the URL http://your-domain.com. You should see the welcome screen:
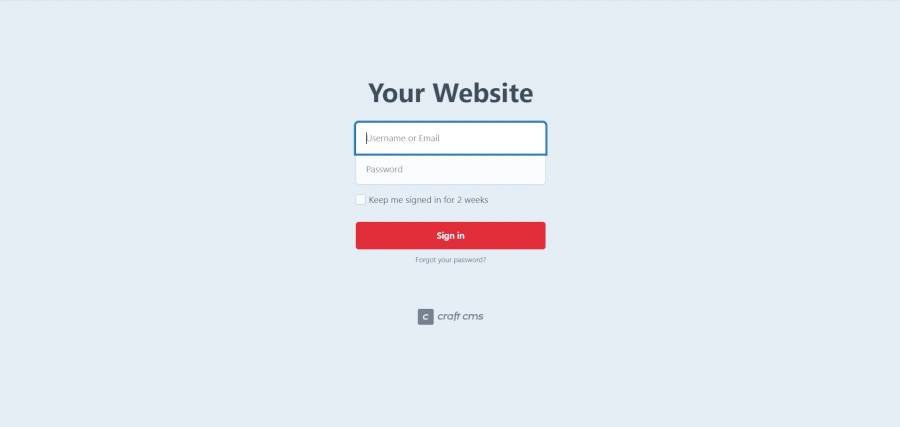
To access Craft’s administrative interface type the URL http://your-domain.com/admin you should see the login page:
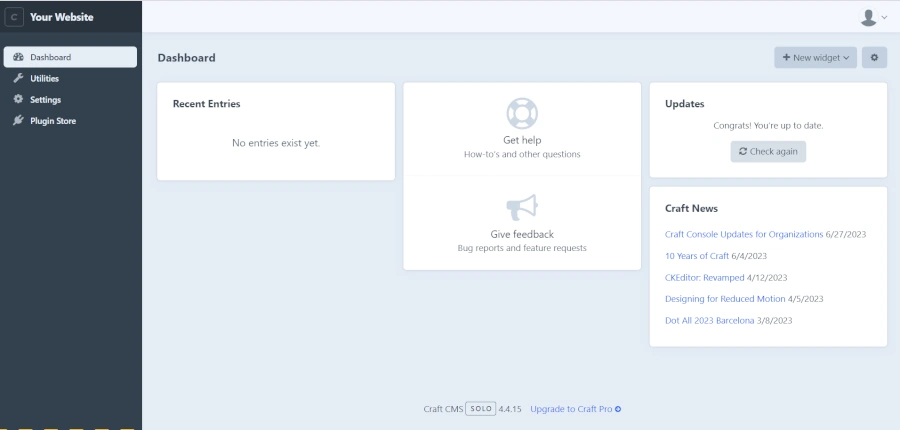
Provide your admin credential and click on the Sign in button, you should see the Craft CMS dashboard in the following page:
Comments and Conclusion
Congratulations! You have successfully installed Craft CMS with Nginx on Debian 12 OS. You can now create your own website easily using Craft CMS.
For additional help or useful information, we recommend you to check the official Craft CMS documentation.