
ERPNext is one of the most powerful open-source ERP systems available today. Built on the Frappe Framework, it provides modules for Accounting, HR, CRM, Projects, Inventory, Sales, POS, Manufacturing, and much more. With the release of ERPNext 15, users get improved UI, faster performance, and more stable backend architecture.
In this tutorial, you’ll learn how to install ERPNext 15 on Debian 13 from scratch including all dependencies, system configuration, database tuning, production setup and install an SSL certificate.
Step 1: Update Operating System
First check the server’s current time zone with the following command:
# dateThen Set correct time zone as per your region with the following command:
# timedatectl set-timezone "America/Chicago"This is a important step as it impacts the ERPNext usage.
Then update your Debian 13 operating system to the latest version with the following command:
# apt update && apt upgradeThis ensures all dependencies are up-to-date and prevents conflicts later.
Step 2: Install Required Dependencies
In this step we will install the required system-level packages for the system to work correctly.
# apt install -y git curl wget sudo certbotAlso, ERPNext needs several Python packages to build Python modules and run Frappe.
# apt install -y python3 python3-dev python3-setuptools python3-pip python3-venv libffi-dev libssl-dev libsasl2-dev
These libraries allow Frappe to compile PDF rendering, image processing, database drivers, and more.
Step 3: Add a new user
Now we will create a dedicated user for your ERP application. This user will be assigned admin permissions and will be used as the main Frappe Bench user:
# /sbin/adduser erpnextTo add the user to the sudo group, use the usermod command as follows:
# /sbin/usermod -aG sudo erpnextThen log in as the new user:
# su - erpnextStep 4: Install MariaDB
You can install the MariaDB server with the following command:
$ sudo apt install -y mariadb-server mariadb-clientStart the database server daemon, and also enable it to start automatically at the next boot with the following commands:
$ sudo systemctl start mariadb
$ sudo systemctl enable mariadb
Verify the status of the MariaDB service using systemctl status command:
$ sudo systemctl status mariadbBy default, MariaDB is not hardened. You can secure MariaDB using the mariadb-secure-installation script.
$ sudo mariadb-secure-installationConfigure it like this:
- Set root password? [Y/n] Y
- Remove anonymous users? [Y/n] Y
- Disallow root login remotely? [Y/n] Y
- Remove test database and access to it? [Y/n] Y
- Reload privilege tables now? [Y/n] Y
Step 5: Install Node.js
Run the following command to install Node.js:
$ sudo apt install nodejs npmYou can verify the installation by running the following command:
$ node --versionYou should see the version number of Node.js installed on your system:
v20.19.2Then verify the npm version with the following command:
$ npm --versionYou should get the following output:
9.2.0ERPNext uses Yarn for building frontend assets.
$ sudo npm install -g yarnStep 6: Install Redis Server
Redis handles caching and web socket communication for real-time features.
$ sudo apt install -y redis-server
$ sudo systemctl enable --now redis-server
Step 7: Install Frappe Bench
Bench is the command-line tool used to manage ERPNext installations. Use the following commands to install the Bench CLI:
$ sudo apt remove python3-requests
$ sudo python3 -m pip config set global.break-system-packages true
$ sudo pip3 install frappe-bench
Confirm installation:
$ bench --versionYou should get the following output:
5.27.0Now initialize a new Bench directory:
$ bench init frappe-bench --frappe-branch version-15
$ cd frappe-bench
This creates a full environment with Python virtualenv and node tools.
Now change user directory permissions. This will allow execution permission to the home directory of the frappe user.
chmod -R o+rx /home/erpnext/Create a new Frappe site with the following command:
$ bench new-site erp.yourdomain.comYou will be prompted for:
- MySQL root password
- ERPNext administrator password
Step 8: Install ERPNext and other Apps
Finally, we’re at the last stage of the installation process!
Download the payments apps . This app is required during ERPNext installation
$ bench get-app paymentsDownload the main ERPNext app with the following command:
$ bench get-app --branch version-15 erpnextDownload the HR & Payroll app (optional)
$ bench get-app hrmsCheck if all the apps are correctly downloaded by running:
$ bench version --format tableNow install it on your site:
$ bench --site erp.yourdomain.com install-app erpnextInstall the HR & Payroll app (optional)
$ bench --site erp.yourdomain.com install-app hrmsStep 9: Test ERPNext in Development Mode (Optional)
You can launch a development server with the following command:
$ bench startYou can access ERPNext at:
http://YOUR_SERVER_IP:8000Step 10: Setting ERPNext in Production Mode
For the production environment, we need to configure Nginx and Supervisor to keep application running in background.
You can install them with the following command:
$ sudo apt install nginx supervisorEnable scheduler service
$ bench --site erp.yourdomain.com enable-schedulerDisable maintenance mode
bench --site erp.yourdomain.com set-maintenance-mode offSetup production config
$ sudo bench setup production erpnextRestart Supervisor
$ sudo supervisorctl restart allStep 11: Custom Domain & SSL Setup
For SSL configuration, you can run the following commands:
$ bench config dns_multitenant on
$ sudo bench setup lets-encrypt erp.yourdomain.com
Step 12: Access your ERPNext Application
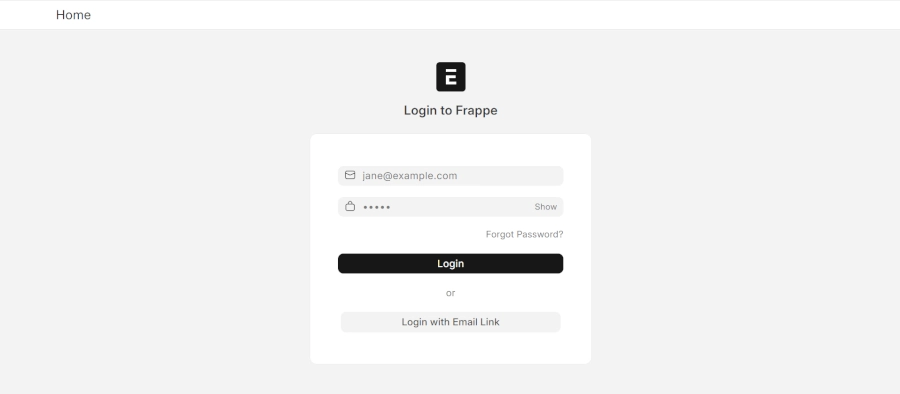
Open your browser and type your domain e.g https://erp.yourdomain.com
Comments and Conclusion
Installing ERPNext 15 on Debian 13 is straightforward when following the official bench method.
This tutorial covered everything from installing dependencies and configuring MariaDB to setting up NGINX, Supervisor, and full production deployment.
ERPNext 15 provides excellent performance, modularity, and flexibility. With this setup, your business now has a powerful ERP ready to use.
For additional help or useful information, we recommend you to check the official ERPNext documentation.
If you have any questions please leave a comment below.