
Roundcube is a free open-source web-based multilingual IMAP email client written in PHP. It provides the full functionality you expect from an email client, including MIME support, address book, folder manipulation, message searching, and spell checking.
This tutorial is going to show you how to install Roundcube webmail on Ubuntu 22.04 with Nginx web server and MySQL database server.
Step 1: Update Operating System
Before you can proceed with installation and configuration of Roundcube webmail on Ubuntu 22.04, update and upgrade your system packages to the latest version with the following command:
# apt update && sudo apt upgrade -yStep 2: Install Nginx Web Server
In this tutorial, we will use Nginx. If you prefer Apache or another web server, you can use that instead of Nginx.
You can install Nginx via apt package manager by executing the following command.
# apt install nginxYou can start the Nginx service and configure it to run on startup by entering the following commands:
# systemctl start nginx
# systemctl enable nginx
Verify the status of the Nginx service using systemctl status command:
# systemctl status nginxOutput:
● nginx.service - A high performance web server and a reverse proxy server
     Loaded: loaded (/lib/systemd/system/nginx.service; enabled; vendor preset: enabled)
     Active: active (running)
       Docs: man:nginx(8)
   Main PID: 5317 (nginx)
      Tasks: 2 (limit: 2196)
     Memory: 2.6M
        CPU: 31ms
     CGroup: /system.slice/nginx.service
             ├─5317 "nginx: master process /usr/sbin/nginx -g daemon on; master_process on;"
             └─5318 "nginx: worker process
Step 3: Install PHP and required PHP extensions for Roundcube
Run the following command to install the required PHP extensions. PHP8.1 is fully supported in the 1.6 release.
# apt install php php-fpm php-gd php-common php-json php-imagick php-imap php-xml php-mbstring php-curl php-zip php-bz2 php-intl php-ldapVerify if PHP is installed.
# php -vOutput:
PHP 8.1.2-1ubuntu2.9 (cli) (built: Oct 19 2022 14:58:09) (NTS)
Copyright (c) The PHP Group
Zend Engine v4.1.2, Copyright (c) Zend Technologies
with Zend OPcache v8.1.2-1ubuntu2.9, Copyright (c), by Zend TechnologiesStep 4: Install MySQL and create a database
You can install the MySQL server with the following command:
# apt install mysql-serverStart the database server daemon, and also enable it to start automatically at the next boot with the following commands:
# systemctl start mysql
# systemctl enable mysql
Verify the status of the MySQL service using systemctl status command:
# systemctl status mysqlOutput:
● mysql.service - MySQL Community Server
     Loaded: loaded (/lib/systemd/system/mysql.service; enabled; vendor preset: enabled)
     Active: active (running)
   Main PID: 1083 (mysqld)
     Status: "Server is operational"
      Tasks: 41 (limit: 2797)
     Memory: 434.0M
        CPU: 1min 57.932s
     CGroup: /system.slice/mysql.service
             └─1083 /usr/sbin/mysqld
By default, MySQL is not hardened. You can secure MySQL using the mysql_secure_installation script.
# mysql_secure_installationConfigure it like this:
- Set root password? [Y/n] Y
- Remove anonymous users? [Y/n] Y
- Disallow root login remotely? [Y/n] Y
- Remove test database and access to it? [Y/n] Y
- Reload privilege tables now? [Y/n] Y
Now run the command below to log in to the MySQL shell.
# mysql -u root -pOnce you are logged in to your database server you need to create a database for the Roundcube installation:
mysql> CREATE DATABASE roundcubemail;
mysql> CREATE USER 'roundcube'@'localhost' IDENTIFIED BY 'Strong-Password';
mysql> GRANT ALL PRIVILEGES ON roundcubemail . * TO 'roundcube'@'localhost';
mysql> FLUSH PRIVILEGES;
mysql> exit;
Step 5: Download Roundcube
Roundcube is availble on the default Ubuntu repos. However, the repositories do not usually provide an up-to-date version.
The latest stable release version for Roundcube can be installed by downloading the source code from the Roundcube downloads page.
Using the address with wget, download the Roundcube tarball on the server:
# wget https://github.com/roundcube/roundcubemail/releases/download/1.6.0/roundcubemail-1.6.0-complete.tar.gzCreate a roundcube directory:
# mkdir /var/www/roundcube/After that, you will need to decompress the Roundcube archive:
# tar -xvzf roundcubemail-1.6.0-complete.tar.gz -C /var/www/roundcube/ --strip-components 1Make Nginx the owner of the roundcube folder and grant it sufficient permissions.
# chown -R www-data:www-data /var/www/roundcube
# chmod 755 -R /var/www/roundcube
Now start the example database included in the downloaded file.
# mysql -u roundcube -p roundcube < /var/www/roundcube/SQL/mysql.initial.sqlStep 6: Configure Nginx for Roundcube
Then, create an virtual host configuration file to host Roundcube:
# nano /etc/nginx/conf.d/roundcube.confNginx ignores Roundcube’s Apache .htaccess files, so we’re telling Nginx to ignore some sensitive directories:
server {
        listen 80;

        server_name webmail.your-domain.com;
        root /var/www/roundcube;

        index index.php index.html index.htm;

        error_log /var/log/nginx/roundcube.error;
        access_log /var/log/nginx/roundcube.access;


        location ~ ^/(README.md|INSTALL|LICENSE|CHANGELOG|UPGRADING)$ {
            deny all;
        }

        location ~ ^/(config|temp|logs)/ {
            deny all;
        }

        location ~ /\. {
            deny all;
        }

        location ~ \.php$ {
                include snippets/fastcgi-php.conf;
                fastcgi_pass unix:/run/php/php8.1-fpm.sock;
        }
}
Remember to replace your-domain.com with the domain name of your server.
Save and exit the configuration file.
Check Nginx syntax:
# nginx -t
nginx: the configuration file /etc/nginx/nginx.conf syntax is ok
nginx: configuration file /etc/nginx/nginx.conf test is successful
To implement the changes, restart Nginx webserver:
# systemctl restart nginxStep 7: Roundcube Setup and Configurations
Now open your web browser and go to http://webmail.your-domain.com/installer and you will see the following screen:
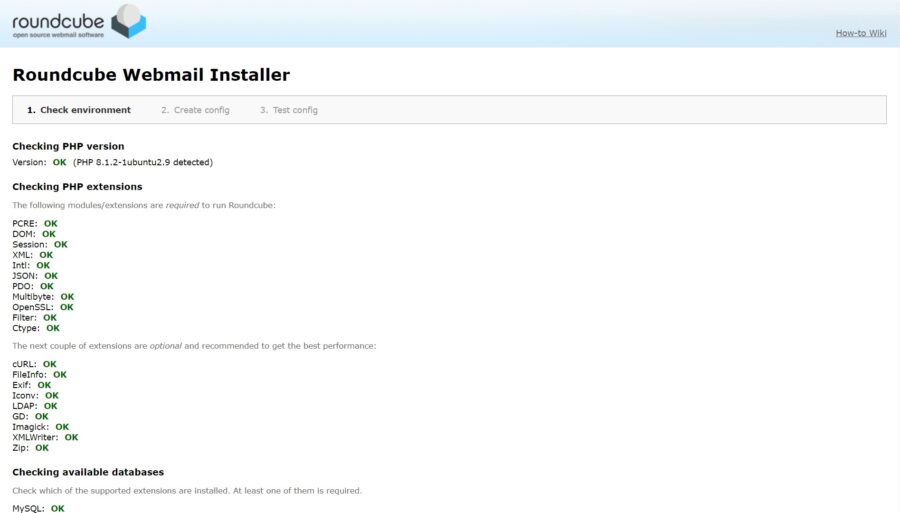
If all required modules and extensions are installed, press NEXT and go to the next step.
On the next page, navigate to Database Setup settings and enter the database name, user and password that you created above.

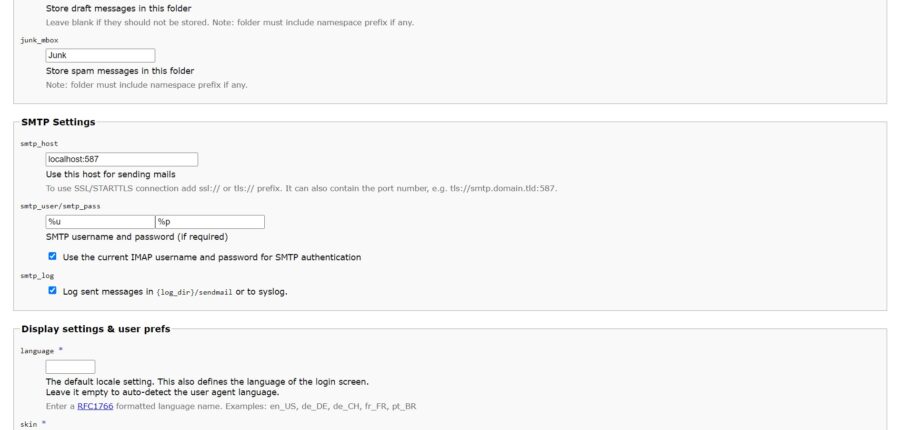
Under SMTP settings, check the box ‘Use the current IMAP username and password for SMTP authentication’:
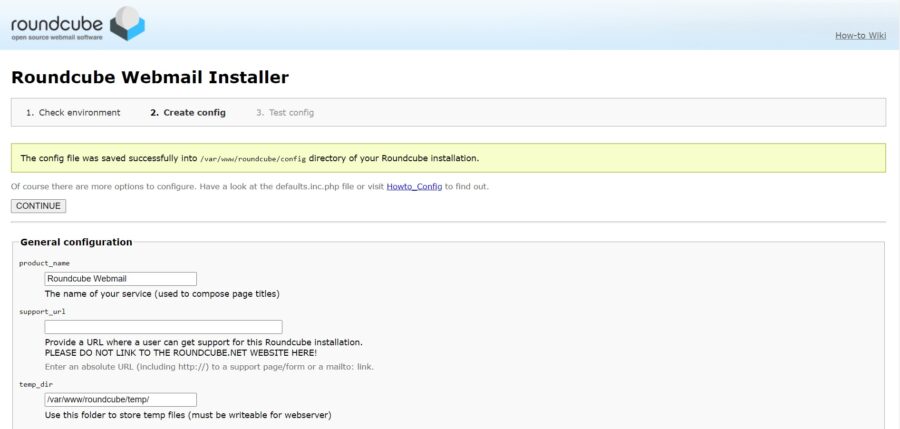
After complete configuration , Press CREATE CONFIG to finish the installation. You will then be notified that the configuration has been successfully created.
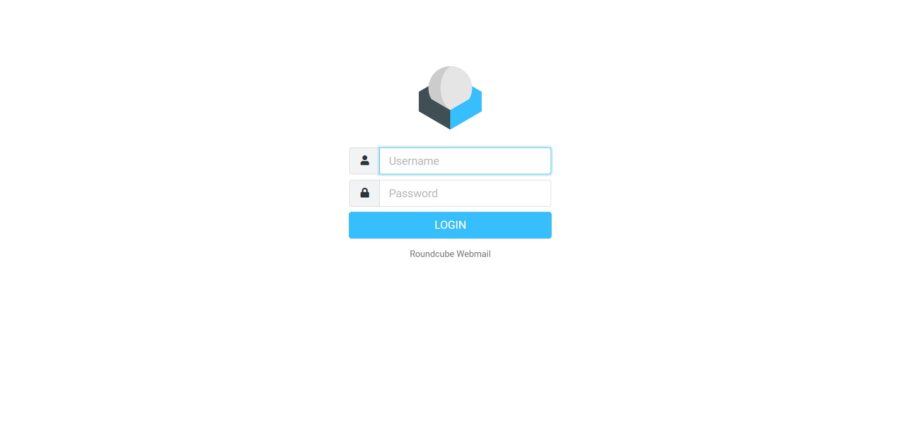
Once everything is setup and working, open your terminal and remove the installation directory with the following command:
# rm -rf /var/www/roundcube/install/And now go to http://webmail.your-domain.com so you can log in.
Comments and Conclusion
Congratulations! You have successfully installed Roundcube webmail client. Thanks for using this tutorial for installing the Roundcube on Ubuntu 22.04 OS.
I completed all the steps, but I can’t log in as an administrator user, what could be happening?
RoundCube is a webmail client, you can’t manage email accounts through RoundCube you need to do that on the mail server.
sudo mysql -u roundcube -p roundcubemail < mysql.initial.sql