
Odoo is an open-source suite of integrated business applications that includes various modules for different business needs. Odoo is developed using the Python programming language and follows a modular architecture, allowing users to select and deploy the specific modules that suit their business requirements.
The system is highly customizable, and it covers a wide range of business functions. It provides a comprehensive set of tools to manage various aspects of a business, from sales and finance to human resources and inventory management.
In this tutorial, we will show you how to configure Odoo with Apache 2 as Reverse Proxy on Debian 12 OS.
If you do not have Odoo installed on your server you can follow our tutorial how to install Odoo 17 on Debian 12.
Step 1: Update Operating System
Update your Debian 12 operating system to the latest version with the following command:
# apt update && apt upgradeStep 2: Install Apache webserver
You can install it via apt package manager by executing the following command.
# apt install apache2You can verify the status of the Apache service using the systemctl status command:
# systemctl status apache2Output:
● apache2.service - The Apache HTTP Server
     Loaded: loaded (/lib/systemd/system/apache2.service; enabled; preset: enabled)
     Active: active (running)
       Docs: https://httpd.apache.org/docs/2.4/
    Process: 1127 ExecStart=/usr/sbin/apachectl start (code=exited, status=0/SUCCESS)
   Main PID: 1131 (apache2)
      Tasks: 6 (limit: 2273)
     Memory: 18.4M
        CPU: 86ms
     CGroup: /system.slice/apache2.service
             ├─1131 /usr/sbin/apache2 -k start
             ├─1132 /usr/sbin/apache2 -k start
             ├─1133 /usr/sbin/apache2 -k start
Step 3: Enable Apache Modules
Next run the following commands to enable all necessary modules:
# /usr/sbin/a2enmod rewrite
# /usr/sbin/a2enmod proxy
# /usr/sbin/a2enmod proxy_http
# /usr/sbin/a2enmod proxy_html
# /usr/sbin/a2enmod headers
Then restart the Apache web server:
# systemctl restart apache2Step 4: Configure Apache for Odoo
Run the commands below to create a new VirtualHost file called odoo in the /etc/apache2/sites-available/ directory.
# nano /etc/apache2/sites-available/odoo.confPaste the content as shown below:
 <VirtualHost *:80>
    ServerAdmin [email protected]
    DocumentRoot /var/www/html/

    ServerName your-domain.com
    ServerAlias www.your-domain.com

    ProxyPass / http://127.0.0.1:8069/
    ProxyPassReverse / http://127.0.0.1:8069/>

    ErrorLog /var/log/apache2/your-domain.com-error_log
    CustomLog /var/log/apache2/your-domain.com-access_log common

 </VirtualHost>
Remember to replace your-domain.com with the domain name of your server.
Then save and exit the configuration file.
To enable this site run the following command:
# ln -s /etc/apache2/sites-available/odoo.conf /etc/apache2/sites-enabled/odoo.confTo implement the changes, you need to restart the Apache webserver:
# systemctl restart apache2Step 5: Install free Let’s Encrypt SSL certificate (Optional)
First you need to install the Certbot client which is used to create Let’s Encrypt certificates:
# apt install certbot python3-certbot-apacheThen to get the SSL certificate using the Certbot, type the following command:
# certbot --apache -d your-domain.com -d www.your-domain.comIf the SSL certificate is successfully obtained, certbot displays a message to show the configuration was successful:
IMPORTANT NOTES:
 - Congratulations! Your certificate and chain have been saved at:
   /etc/letsencrypt/live/your-domain.com.com/fullchain.pem
   Your key file has been saved at:
   /etc/letsencrypt/live/your-domain.com/privkey.pem
   Your cert will expire on 2024-03-02. To obtain a new or tweaked
   version of this certificate in the future, simply run certbot
   again. To non-interactively renew *all* of your certificates, run
   "certbot renew"
 - Your account credentials have been saved in your Certbot
   configuration directory at /etc/letsencrypt. You should make a
   secure backup of this folder now. This configuration directory will
   also contain certificates and private keys obtained by Certbot so
   making regular backups of this folder is ideal.
 - If you like Certbot, please consider supporting our work by:

   Donating to ISRG / Let's Encrypt:   https://letsencrypt.org/donate
   Donating to EFF:                    https://eff.org/donate-le
Now, you have successfully installed SSL on your website.
Step 6: Odoo Proxy Configuration
Make sure that Odoo is configured to work behind a proxy. In the Odoo configuration file (/etc/odoo.conf), you need to set the proxy_mode parameter to True:
proxy_mode = True
After making the changes, it’s important to restart the Odoo service to ensure the changes take effect:
# systemctl restart odoo
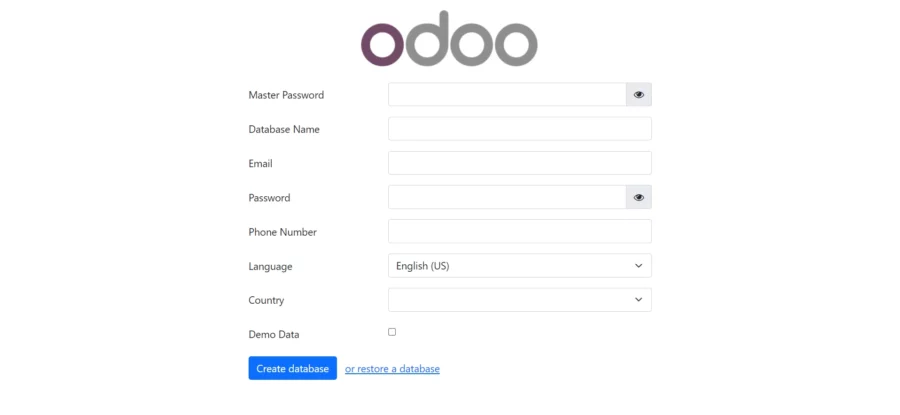
Step 7: Access Odoo server
Open your web browser and type the URL https://your-domain.com. You should see the following page:
Comments and Conclusion
Congratulations! You have successfully configured Odoo with Apache 2 as Reverse Proxy on your Debian 12 OS.
For additional information, you can check the official Odoo documentation.
If you have any questions please leave a comment below.
Hi,
Thanks you for this very good documentation.
Just one question: How do for blocking public_IP:8069 and use only https://your-domain.com ?
Regards
Sylvain
You can modify the Odoo configuration file and add the following line:
Setup reverse proxy