
Backdrop CMS is an open-source content management system (CMS) that is designed to be a user-friendly and accessible alternative to other popular CMS platforms, especially Drupal.
It is built on the same PHP technology stack as Drupal, but it is intended to be more straightforward and more suitable for smaller organizations, non-profits, and individuals who want a powerful CMS without the complexity often associated with Drupal.
Overall, Backdrop CMS aims to strike a balance between being easy to use and having the capabilities necessary to build and manage websites effectively, making it a suitable choice for those looking for a middle ground between simplicity and customization.
To get started with installing Backdrop on Debian 12, follow the steps below:
Step 1: Update Operating System
Update and upgrade your system packages to the latest version with the following command:
# apt update && apt upgradeStep 2: Install Nginx
You can install Nginx web server via apt package manager by executing the following command:
# apt install nginxVerify the status of the Nginx service using systemctl status command:
# systemctl status nginxOutput:
● nginx.service - A high performance web server and a reverse proxy server
     Loaded: loaded (/lib/systemd/system/nginx.service; enabled; preset: enabled)
     Active: active (running)
       Docs: man:nginx(8)
   Main PID: 717 (nginx)
      Tasks: 2 (limit: 2273)
     Memory: 5.0M
        CPU: 71ms
     CGroup: /system.slice/nginx.service
             ├─717 "nginx: master process /usr/sbin/nginx -g daemon on; master_process on;"
             └─718 "nginx: worker process"
Step 3: Install PHP
To install PHP and the necessary extensions, run the following command:
# apt install php php-cli php-fpm php-json php-common php-mysql php-zip php-gd php-mbstring php-curl php-xmlOnce the installation is complete verify if PHP is installed:
php -vOutput:
PHP 8.2.12 (cli) (built: Oct 27 2023 13:00:10) (NTS)
Copyright (c) The PHP Group
Zend Engine v4.2.12, Copyright (c) Zend Technologies
with Zend OPcache v8.2.12, Copyright (c), by Zend Technologies
Step 4: Install MariaDB and create a database
To install MariaDB run the following command:
# apt install mariadb-server mariadb-clientVerify the status of the MariaDB service using systemctl status command:
# systemctl status mariadbOutput:
● mariadb.service - MariaDB 10.11.4 database server
     Loaded: loaded (/lib/systemd/system/mariadb.service; enabled; preset: enabled)
     Active: active (running)
       Docs: man:mariadbd(8)
             https://mariadb.com/kb/en/library/systemd/
   Main PID: 772 (mariadbd)
     Status: "Taking your SQL requests now..."
      Tasks: 9 (limit: 2273)
     Memory: 249.5M
        CPU: 2.711s
     CGroup: /system.slice/mariadb.service
             └─772 /usr/sbin/mariadbd
By default, MariaDB is not hardened. You can secure MariaDB using the mysql_secure_installation script.
# mysql_secure_installationConfigure it like this:
- Set root password? [Y/n] Y
- Remove anonymous users? [Y/n] Y
- Disallow root login remotely? [Y/n] Y
- Remove test database and access to it? [Y/n] Y
- Reload privilege tables now? [Y/n] Y
Now run the command below to log in to the MariaDB shell.
# mysql -u root -pOnce you are logged in to your database server you need to create a database for the Backdrop installation:
MariaDB [(none)]> CREATE DATABASE backdrop;
MariaDB [(none)]> CREATE USER 'backdrop'@'localhost' IDENTIFIED BY 'Str0ngPass';
MariaDB [(none)]> GRANT ALL PRIVILEGES ON backdrop. * TO 'backdrop'@'localhost';
MariaDB [(none)]> FLUSH PRIVILEGES;
MariaDB [(none)]> EXIT;
Step 5: Download Backdrop
The latest version of Backdrop is available to download from GitHub. You can download it with the following command:
# wget https://github.com/backdrop/backdrop/releases/download/1.26.1/backdrop.zipThen extract file into the folder /var/www/ with the following command:
# unzip backdrop.zip -d /var/www/Then enable permission for the Nginx webserver user to access the files:
# chown -R www-data:www-data /var/www/backdrop/Step 6: Configure Nginx for Backdrop
Create a new Nginx configuration file with the following command:
# nano /etc/nginx/conf.d/backdrop.confPaste the content as shown below:
server {
listen 80;

server_name your-domain.com;
root /var/www/backdrop;
index index.php index.html index.htm;

location / {
    try_files $uri $uri/ /index.php?$args;
   }

location = /favicon.ico {
    log_not_found off;
    access_log off;
   }

location ~* \.(js|css|png|jpg|jpeg|gif|ico)$ {
    expires max;
    log_not_found off;
   }

location = /robots.txt {
    allow all;
    log_not_found off;
    access_log off;
   }

location ~ \.php$ {
    include /etc/nginx/fastcgi_params;
    fastcgi_pass unix:/var/run/php/php8.2-fpm.sock;
    fastcgi_index index.php;
    fastcgi_param SCRIPT_FILENAME $document_root$fastcgi_script_name;
   }
}
Remember to replace your-domain.com with the domain name of your server.
Save and exit the configuration file.
To implement the changes, restart Nginx webserver:
# systemctl restart nginxStep 7: Access Backdrop Web Interface
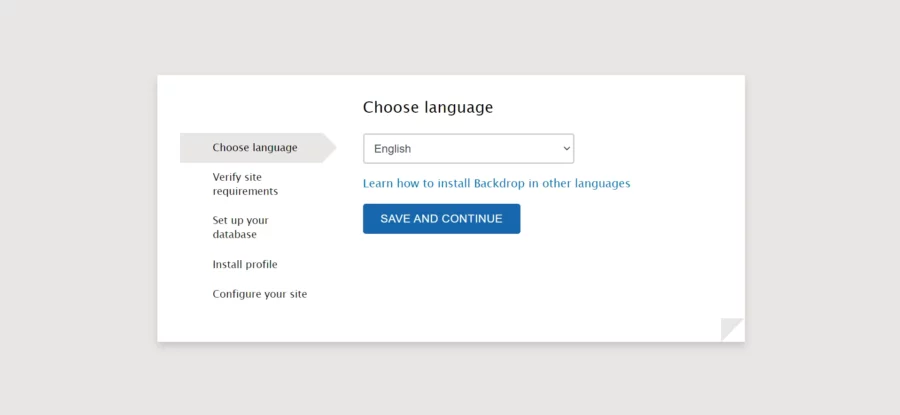
To complete the setup go to your browser and visit http://your-domain.com/. Choose language and click on the SAVE AND CONTINUE button.
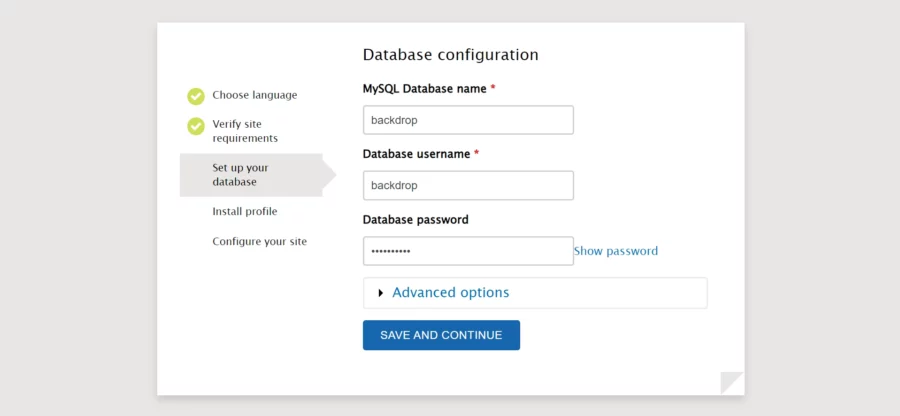
Provide your database details and click on the SAVE AND CONTINUE button.
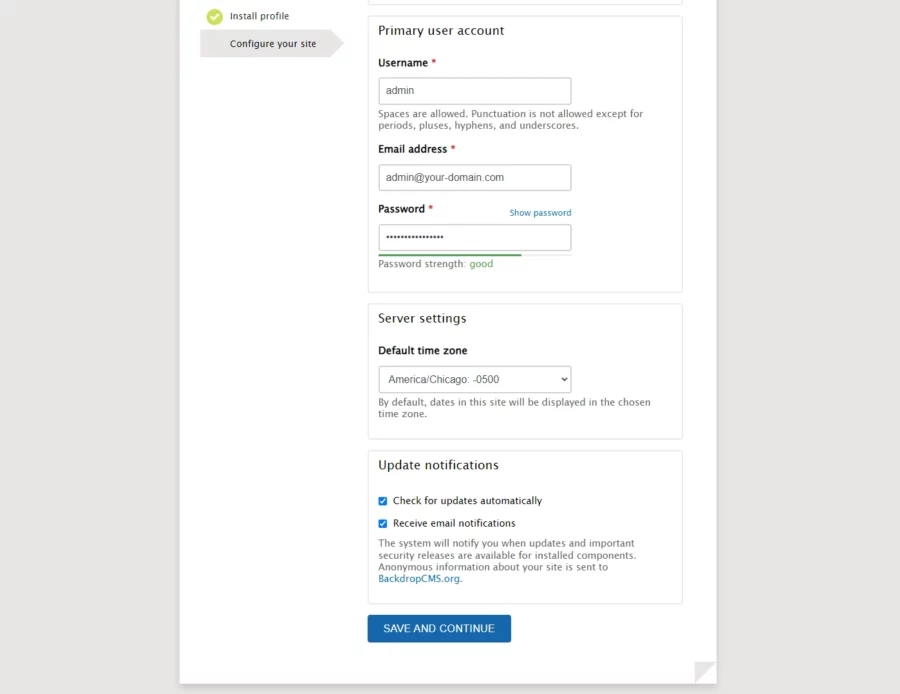
Provide your admin username, password, email then click on the SAVE AND CONTINUE button.
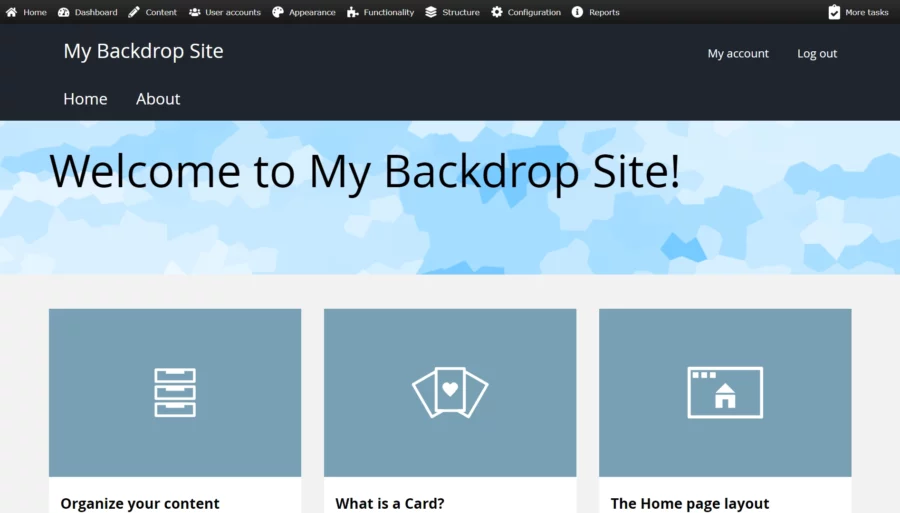
You will get the Backdrop dashboard.
Comments and Conclusion
That’s it. You have successfully installed Backdrop CMS on Debian 12.
For additional help or useful information, we recommend you to check the official Backdrop documentation.
If you have any questions please leave a comment below.